May - 2021
While Heather and I were on vacation in Gualala, CA we visited a shop that sold live edge wood and wood objects. They had this Sun piece that I thought was very nice so I discretely took a picture of it and thought that when I got home I would try to make something like it. I could have made a copy out of wood but I thought I would 3D print a version so that I could decorate it with LEDs as I do with most of my projects. After all I am not called "Mr. Blinky" for nothing at least according to my friends (;>)

As you will see in the images below, I made my own version of the wooden sculpture augmented with LEDs. My version actually has practical application because with the incorporation of some electronics it is a motion controlled night light and an always accurate clock.
While Heather and I were on vacation in Gualala, CA we visited a shop that sold live edge wood and wood objects. They had this Sun piece that I thought was very nice so I discretely took a picture of it and thought that when I got home I would try to make something like it. I could have made a copy out of wood but I thought I would 3D print a version so that I could decorate it with LEDs as I do with most of my projects. After all I am not called "Mr. Blinky" for nothing at least according to my friends (;>)
As you will see in the images below, I made my own version of the wooden sculpture augmented with LEDs. My version actually has practical application because with the incorporation of some electronics it is a motion controlled night light and an always accurate clock.
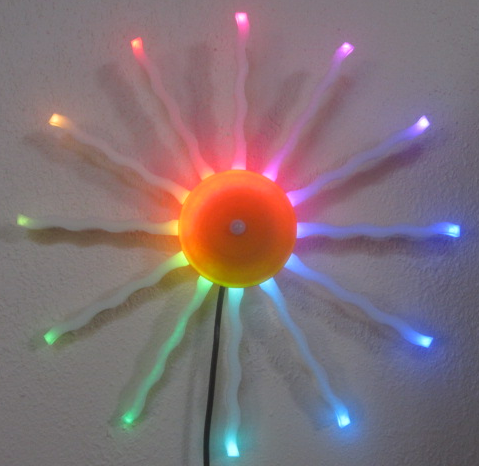 |
When motion is detected the clock lights up and does a gradual brightening which lights up the room day or night, hence a night light. It then displays the time for 3 minutes and finishes with a dynamic and beautiful rotary rainbow effect like that shown at left. After the rainbow pattern display is finished, the clock does dark and waits for the next motion detection event to start the sequence over again. |
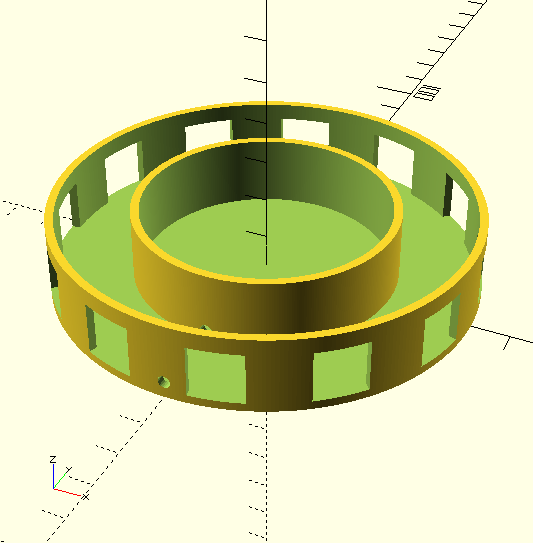 |
The core of the Sun
Clock is this 3D printed piece that was modeled in
OpenSCAD. There are twelve rectangular hole around the
circumference where the rays will be glued. The diameter
of the inner circular support was chosen so that the
Neopixel LED string of 12 LEDs would line up exactly
with the ray centers. The adhesive on the back of the
LED strip was used to hold the LED strip to the circular
support. If you look close you can see a hole in the outer shell and a corresponding hole in the inner support to allow for wiring. |
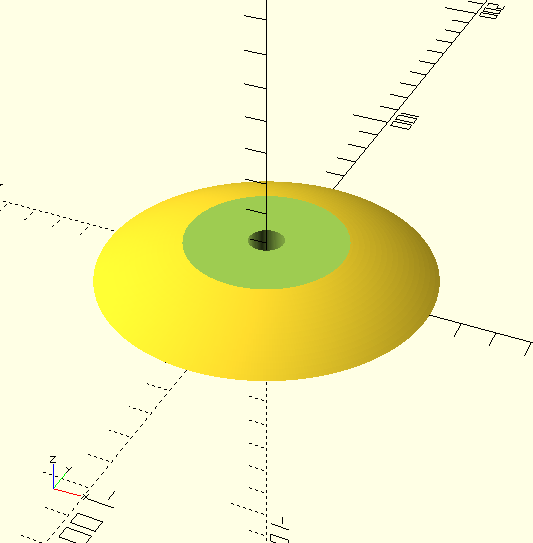 |
Next up is the Sun Clock cap. It was also designed
in OpenSCAD. The hole in the cap is for the motion
sensor. It was necessary to make the cap flat on top
so that it could be 3D printed successfully. It was
printed upside down so that supports were unnecessary. |
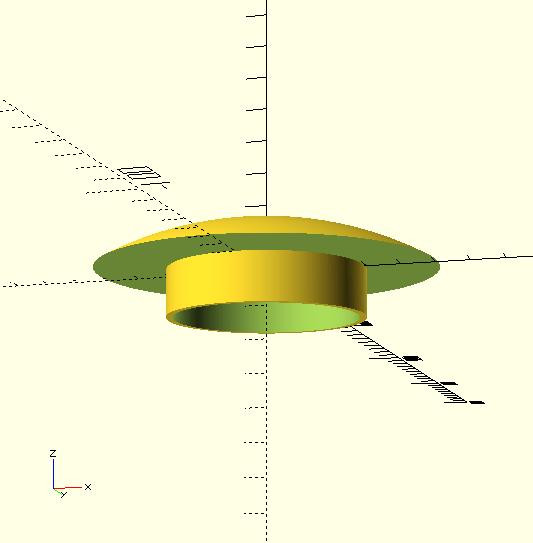 |
Another view of the
cap. The inner ring slides snugly into the LED support
in the core piece. No glue was necessary to attach the
cap to the core. |
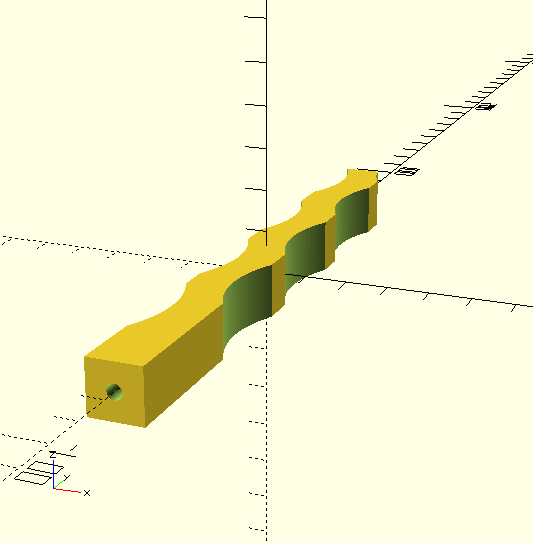 |
This
is the design of Sun Clock ray. 12 of these are
necessary for the clock. There is an unseen hole the
entire length of the ray for a piece of side lighting
optical cable which transports the light from the LEDs
in the core to the end of the rays. |
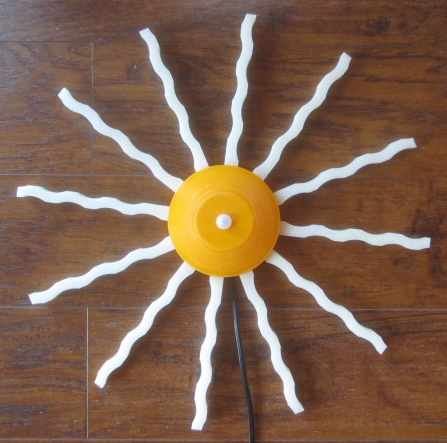 |
Here is the finished Sun Clock. The rays are
attached to the core with super glue. Notice the rays
alternate. That is the rays are attached right side up
then upside down around the clock. What is not shown is that the optical cable inside each ray pushes right up to the LEDs in the core so the rays get the best illumination possible. The black USB cord out of the bottom of the clock is for power and programming. |
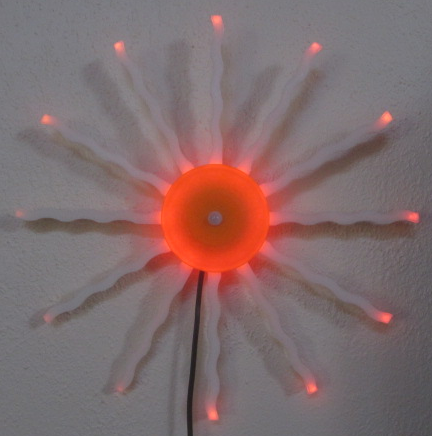 |
As mentioned when motion is detected the Sun Clock
slowly brightens like a Sun rise. |
 |
Half way through the brightening. |
 |
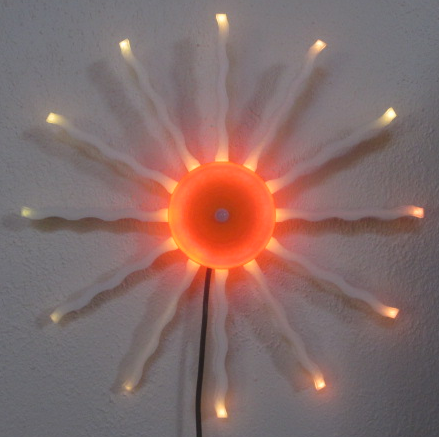
Full brightness |
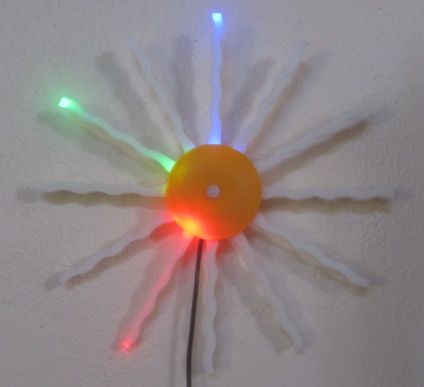 |
After the brightening
process completes the clock displays the current
time with the hour displayed in red, minutes
in green and the seconds in blue. As there are only
12 rays to the Sun Clock, minutes are displayed to
the nearest 5 minute interval. The blue seconds
indication advances around the clock every second. The time being displayed is 7:50:00. The clock runs in 12 hour format. A code change would be required to run in 24 hour time. |
In terms of electronics, the Sun Clock is powered by a WEMOS D1 Mini which is an ESP-8266 which has WiFi connectivity. The Mini is programmed using the Arduino IDE. Also inside the clock core are three capacitors to smooth out the USB power for the clock, 12 Neopixels on a Neopixel strip and a motion sensor module. Connection details are provided in the code listing. The NTP protocol is used to fetch the current time from the Internet and that keeps the Sun Clock always accurate.
The code and STL files for the Sun Clock are available on request.
Questions and comments to me Craig at: calhjh@gmail.com