August
2023
A blinky project made from pieces of the Earth; Agate rock slices and beetle killed pine wood.
The Arduino
ESP32 software for the agate light is available for free here.A blinky project made from pieces of the Earth; Agate rock slices and beetle killed pine wood.
| Picture |
Description |
 |
My friends Q and Carol gave me some slices
of beetle killed pine so I decided to make a blinky
thing out of it. I first ran the wood slice through
my planer to create flat working surfaces on both
the front and the back. In the process, the bark
fell off but I liked what I saw under the bark.
Evidence of the beetles which killed this tree. I then thought since all of this creation was made up of natural things (wood and rock) that I should make the top look like the mountains this tree had grown up in so, away I went with my saber saw to cut mountain shapes. |
 |
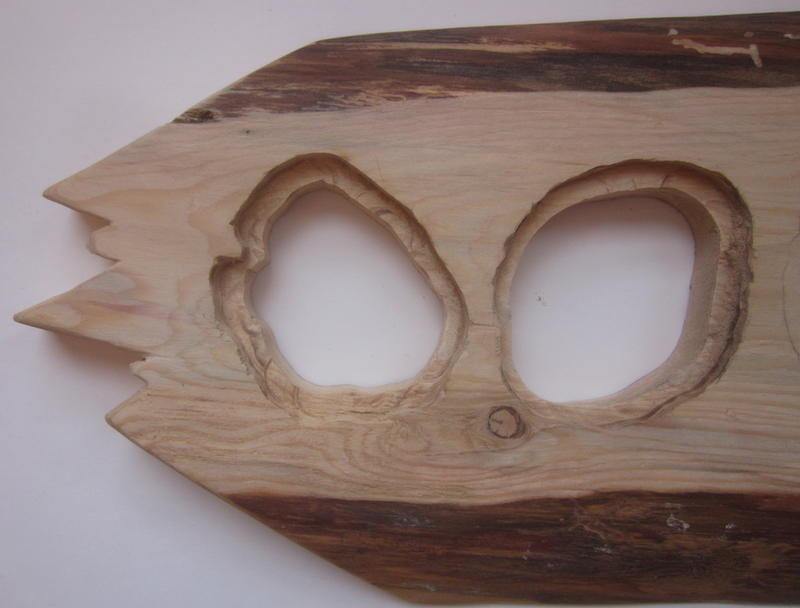
Heather and I went to a great rock shop on
the road to the top of Pikes Peak called the Pikes
Peak Rock Shop and found a bunch of polished agate
slices for the light. I then placed them on the wood
slab and drew their outlines. For the first two agate pieces I tried to use my Dremel tool to cut out the openings for the agate pieces (I wanted them slightly embedded into the wood's surface). This turned out to be really hard since the agate slices are very irregular in shape and thickness. For all of the other agate cutouts I used my router and carefully cut out the shapes. Although this was much faster, it was also less accurate. Oh well. The small round hole on the lower right is where a motion sensor will go. |
 |
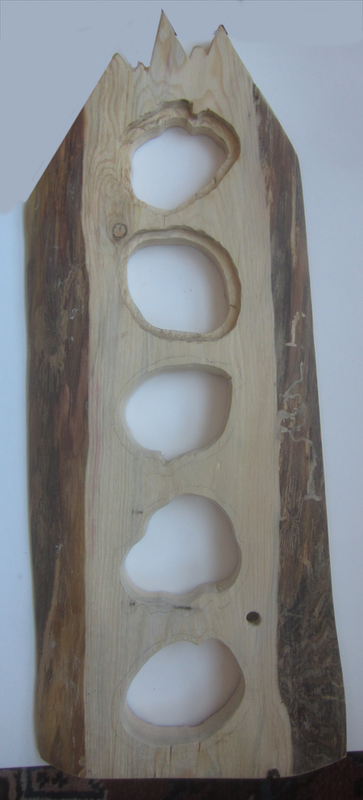
On the back of the wood slice, I had to
drill out some openings between the agate holes for
the wires that will connected the NeoPixels used to
light up this piece. I drilled a cutout for the USB
cable (extreme right) as well. |
 |
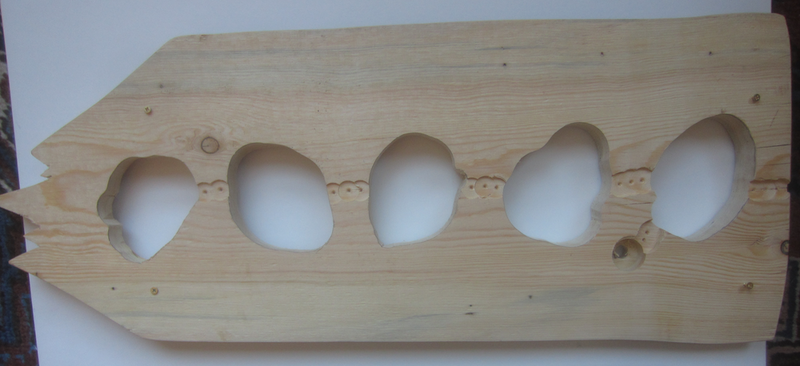
For the back, I attached a piece of matte
board with four screws to the machined wood slab and
then drew the outline of the agate holes so I would
know where the NeoPixels and the associated wiring
needed to go. You might be able to see the penciled
outlines of the agate slices in this image. |
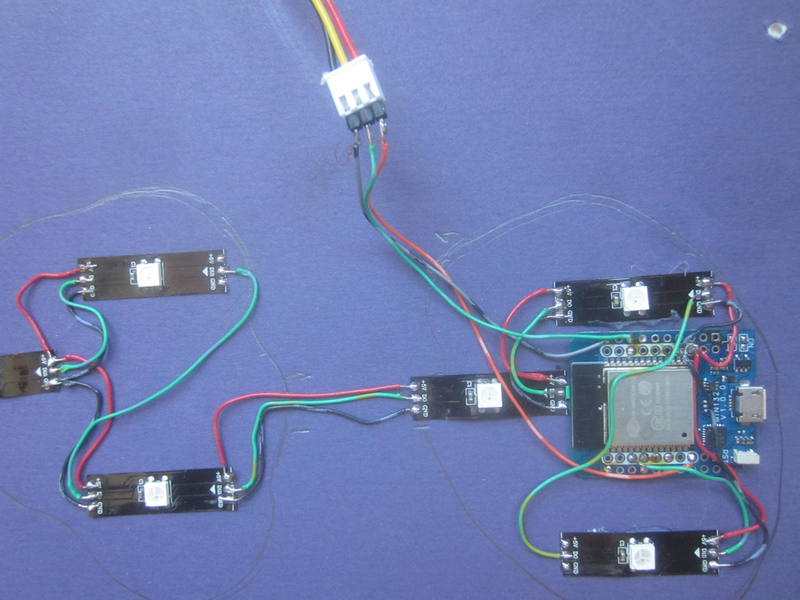 |
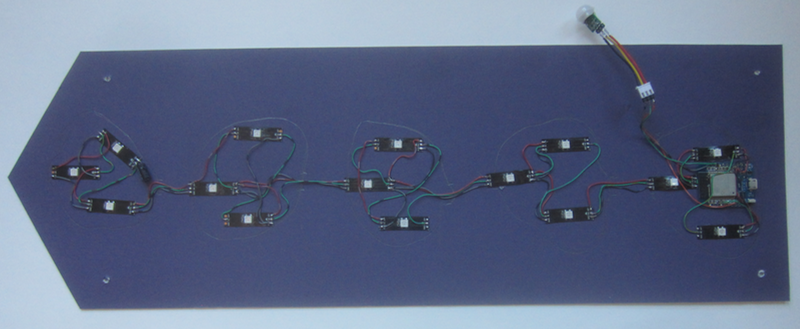
Here is a closeup of the ESP32 micro
controller which controls the NeoPixels. The wires
heading off the top are connected to the motion or
PIR sensor which causes the agate light to light up
when a person is detected. The whole project is powered by a USB power module connected to the ESP32 via a USB cable. Each agate piece has 3 NeoPixels for lighting. The order of the NeoPixels is left, right then top and then bottom to top. There are 15 NeoPixels total. |
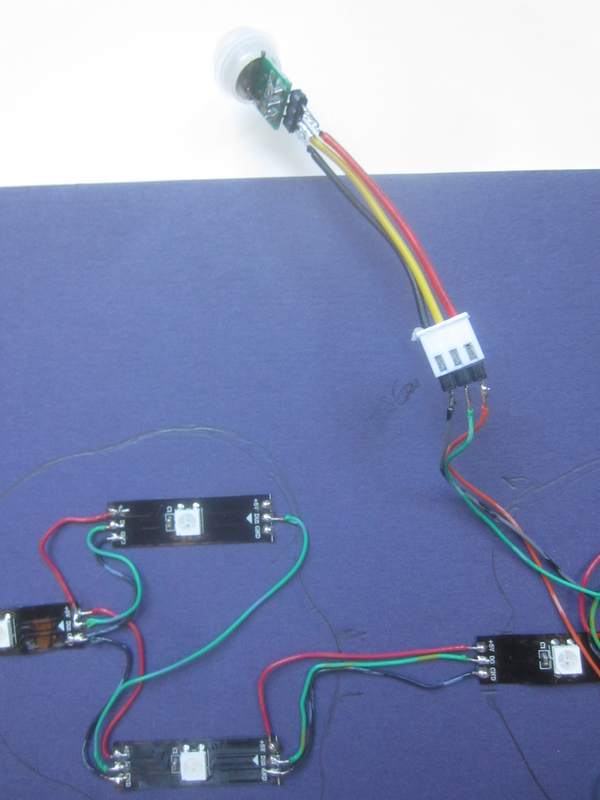 |
This is the sensor which senses a humans
presence. |
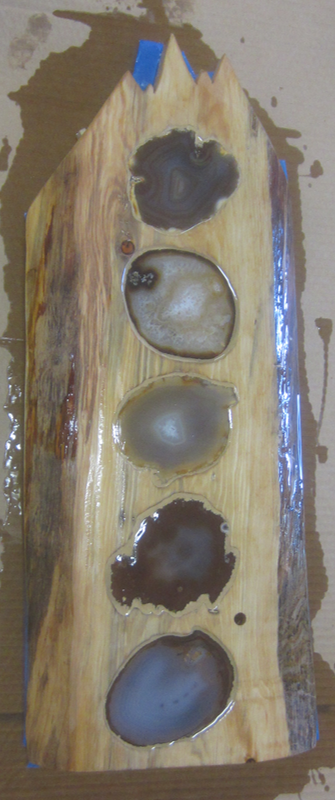 |
After routing out the agate pieces I used
wood putty to hold them in on the front and hot glue
on the back. When everything had hardened, I poured
epoxy resin over the whole thing. I hadn't used
resin in a long time and had forgotten how messy it
is to use. I ended up gluing the wood slab to the
spacer I had underneath and the spacer to the
cardboard under that. I had to use a chisel to
separate everything. The first pour had a lot of issues so after letting it cure for 24 hours, I sanded the whole piece with 80 grit sandpaper and poured again. |
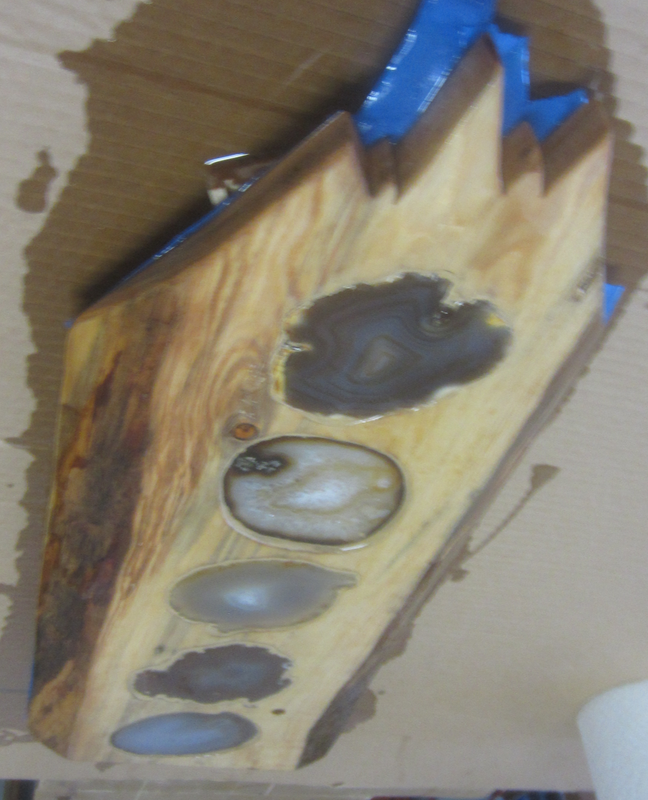 |
It's hard to tell in the photo but the
second pour turned out much better than the first
though not perfect (good enough?). However I had
another problem. The painters tape I used on the
back to contain the drips was now completely
hardened and would not come off. I should have
removed it before the resin had completely hardened.
My bad. So I thought, no problem I will just put a rag down to protect the front of the resin'ed surface and turn the piece over and run the back through the planer again. This should remove all unwanted resin and tape. Unfortunately, the wind caused by the planer blew the rag into the planer mechanism and brought the cutters screeching to a halt and caused the planer to emit smoke. Now I really had a mess on my hands. |
 |
So I spent the next hour pulling the rag
that was severely twisted into the planer mechanism
out thread by thread. Luckily, the planar was not
damaged so I was able to plane the back to get all
of the resin and tape off. What a pain ! With the machining done, I attached the cardboard back with the electronics to the wood piece with 6 flat head screws and with that I called this project done. If the imperfections in the resin ever get to me I might make a third pouring, but I kind of doubt I ever will. Here is the finished agate light hung on the wall. It sleeps until a human passes by and then runs rainbow patterns of randomly selected speeds up and down the piece. Very pretty. These still images just don't do it justice. You should see it in person. |
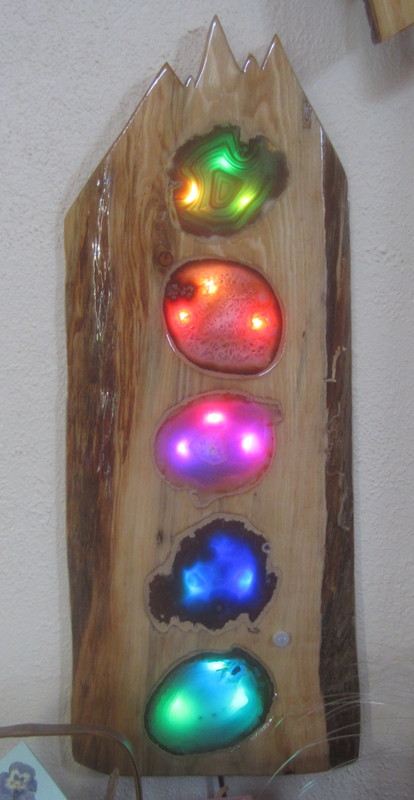 |
Another picture of the agate light. Though
it is hard to see in this image, the natural
geometric patterns in the agate slices really do
stand out, especially after dark. The resin'ed surface also really brings out the colors and character of the wood. You can see beetle damage on the right. I think this project turned out well and it will hang on my wall in the dining room until I make something else to replace it. Thanks Q and Carol. |
Questions and comments to me Craig at: calhjh@gmail.com