Dec
2022 thru June 2024
While visiting Meow Wolf in Santa Fe I saw my first laser musical instrument and had some fun playing around with it. It only had 3 lasers but it was still fun. When I returned from my vacation, the idea of building a more full on laser harp planted itself in my brain. I decided to build one with 12 laser strings and which would have no physical controls but be controlled entirely by a web application. It turns out I built the harp twice which will be described below.
As usual the plan for my laser harp kept expanding and I wanted all of the following features/functions:
This project is made up of
three parts: First, the structure that houses the lasers and
the embedded electronics which I made out of laser cut Baltic
Birch. Second, the electronics that runs the harp software. I
wanted the electronics to be as simple as possible and I think
I succeeded in that it consists of only a WEMOS D1 Mini ESP32
module, 12 lasers, 12 light dependent resistors (LDR) and
miscellaneous resistors. Finally, the software that runs the
harp and powers the web app. While visiting Meow Wolf in Santa Fe I saw my first laser musical instrument and had some fun playing around with it. It only had 3 lasers but it was still fun. When I returned from my vacation, the idea of building a more full on laser harp planted itself in my brain. I decided to build one with 12 laser strings and which would have no physical controls but be controlled entirely by a web application. It turns out I built the harp twice which will be described below.
As usual the plan for my laser harp kept expanding and I wanted all of the following features/functions:
| Feature |
Function |
| MIDI Operation |
I wanted the harp to be a MIDI instrument that
could be plugged into any MIDI supporting equipment.
The original harp didn't produce any sound on its
own, it just generated MIDI codes which cause MIDI
sound sources to which it would be connected to
produce sound. The new harp does generate sounds. |
| Controlled via Web Page |
I didn't want to build physical controls into
the harp. I wanted the harp to be completely
controlled via a web app. |
| Key Change |
The ability of the harp to play in any and every
key. |
| Octave Shift |
The ability of the harp to play over a wide
octave range |
| Scale |
The ability of the harp to play in many
different scales from the basic chromatic scale to
more obscure east Asian scales. |
| Program/Voice |
The ability of the harp to use the full 128
programs/voices supported by General MIDI |
| MIDI Channel |
The ability of the harp to send MIDI messages
over any MIDI channel (1 .. 16). Note, if you select
channel 10 the harp plays drums. |
| String Order |
The ability of the harp to reorder the strings
so that the lowest note is the left most string or
the right most string. In other words, the string
order should be able to be set Left to Right or
Right to Left. |
| Volume |
The ability of the
harp to control its volume. |
| Modulation |
The ability of the
harp to control modulation level. |
| Reverb |
The ability of the harp to control reverb level. |
| Chorus |
The ability of the harp to control chorus level. |
| Portamento Time |
The ability of the
harp to control glide time between sequential notes
(portamento time). |
| Onboard MIDI synthesizer |
The original triangular harp could only output
to an external synthesizer via MIDI to create
sounds. The new harp, however, has a built in
synthesizer in the form of an M5 Synthesizer Unit
based on the SAM 2695 chip. Details are here.
The new harp can still output external MIDI like the
original. Additionally, there is a toggle switch now
built in with can turn off the internal synth for
when external MIDI is being used. |
Here are some pictures taken during the laser harp's construction.
| Picture |
Description |
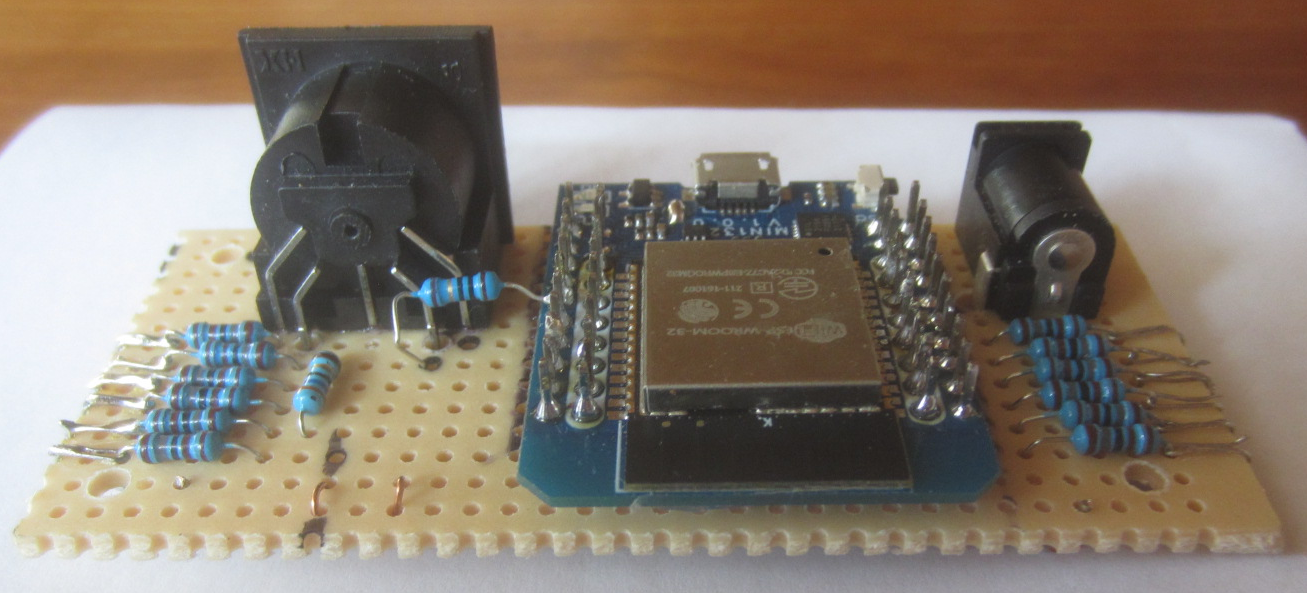
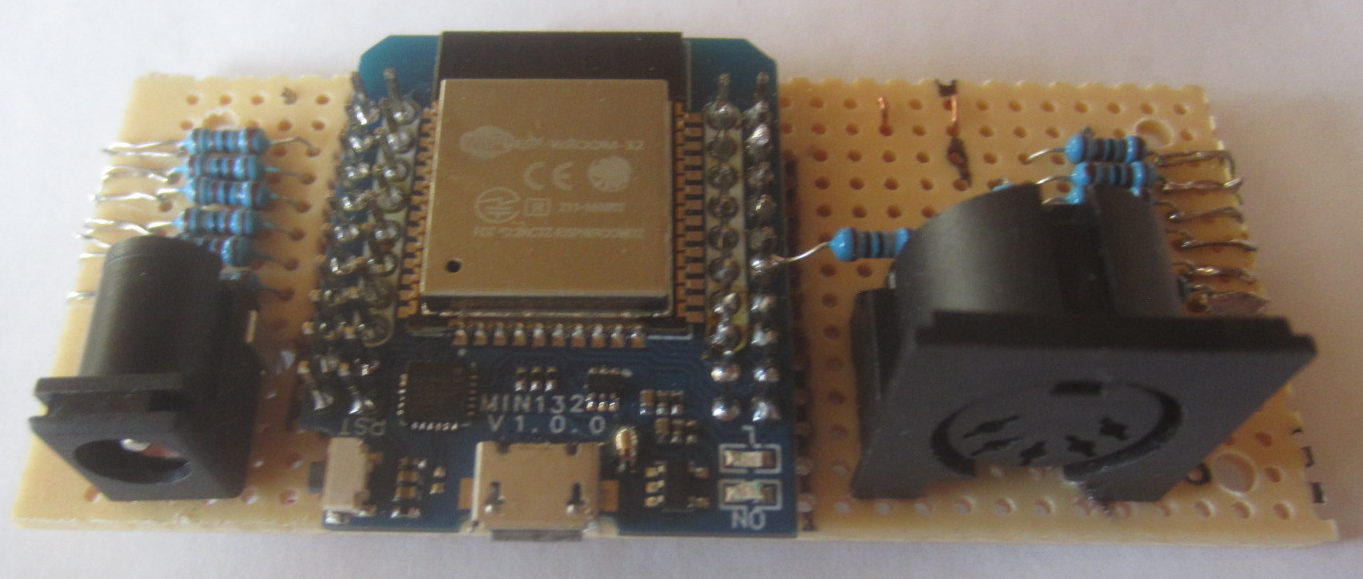 |
The electronics that drives the laser harp. On the
left is the external power jack. The ESP32 module is
in the middle. The MIDI DIN connector is on the right.
This module will be mounted inside the laser harp. The
harp will be externally powered via a 5 volt wall
wort. |
 |
Rear view of the electronics. There is a 1.8K
resistor for each of the 12 strings and 2 resistors
for the MIDI output. Each string will also have a
Light Dependent Resistor (LDR) for sensing laser
light. |
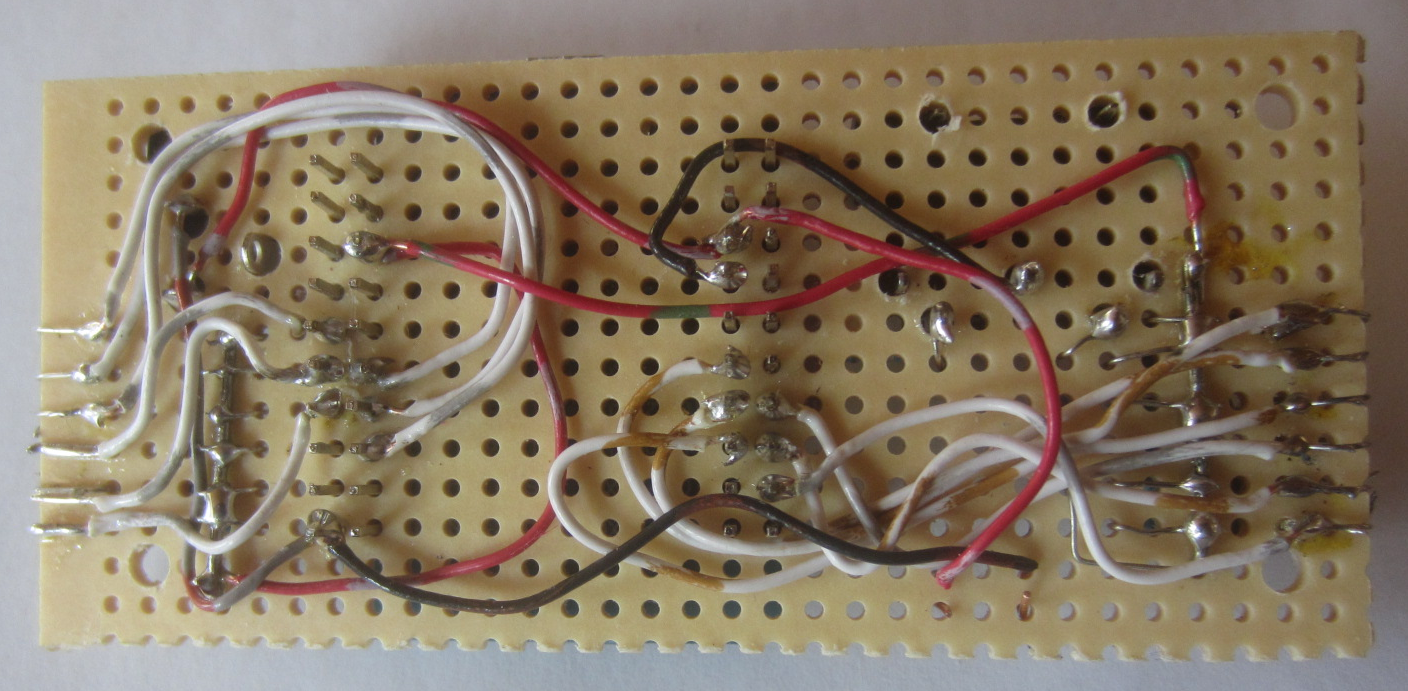 |
Point to point wiring was used as can be seen
here. |
 |
In preparation for wiring up the harp I attached
all of the required wires to the breadboard because
once it is installed in the harp I wouldn't be able to
solder them easily. |
 |
Initially I wanted to build the laser harp into a
triangle structure so I built what you see here.
Unfortunately, in this configuration it was impossible
to accurately aim the lasers onto the light dependent
resistors housed in the horizontal part of the
triangle. So I had to give up this idea and opt
instead for a more rectangular arrangement. |
 |
I decided to use my newly purchased laser cutter
to make a top box which would contain the lasers and a
bottom box that would form and base and house the
electronics. I decided to engrave the top box as well. |
 |
I created a plate as shown that the lasers in
their machined housing would be mounted to via zip
ties. I machined the laser housings out of an aluminum
rod I had. |
 |
Here you see the laser plate mated to the top,
laser cut box. |
 |
This is a bottom view of the connected top and
bottom boxes and the effort I had to go through to
make the LDR's position adjustable in two dimensions
to allow for variations in the lasers themselves. The LDRs are mounted on a laser cut gear like piece of Baltic Birch which is in turn glued to a very strong magnetic ring. The black rectangular items you see are stainless steel so that the LDR modules attract and stay in position. Turns out this didn't even work so I ended up having to hot glue the LDR modules in place. |
 |
Here is the operational laser harp in the new,
rectangular configuration. As you can see the
top and bottom laser cut boxes are held together with
two PVC pipe sections with a threaded rod through each
and nuts to tighten things down. There is a toggle switch and an M5 Synth module mounted in the bottom box. The switch turns the synth module off and on. So the harp will produce sounds when the module is on and will be silent when the harp is connected to an external synthesizer. |
 |
Here is a schematic of the laser harp. As you can
see there isn't much to it. 12 lasers, 12 light
dependent resistors (LDRs), miscellaneous resistors,
an M5 Synth module, a MIDI DIN connector and an ESP32
module. The laser harp magic is in the software which is available here. |
 |
Here is the web app web page used to control the
laser harp. The harp provides its own WiFi access
point called "Laser Harp". To control the laser harp,
connect your device to the access point and point your
browser to: 192.168.4.1 and you should see this UI. Any change made via this UI is reflected immediately in the laser harp's operation. I know this is a crude UI but I am not a web developer as you can tell from this website. The important thing is that it works. |
The laser harp now works but my only regret is that I didn't come up with a better method for aiming the lasers at the LDRs. Perhaps if I had placed the stainless steel plates on the top of the bottom box (instead of underneath) the magnets might have had enough strength to keep the LDRs in place and still allow them to be re-aimed easily. Gluing the LDRs in place will only work until the lasers are disturbed again and then they will have to be removed and re-aimed.
Questions and comments to me Craig at: calhjh@gmail.com