Jan/Feb
2023
The idea for this new project is to have a picture frame with, not 1, but 9, 2.8" LCD SPI displays; hence the name Mega Frame. The frame displays various categories of images that I have photographed, computer generated or collected over the years along with some misc computer graphics. It is motion activated in that the back lights for all of the LCD displays turns on when motion is detected to show the images and then turn off again after 3 minutes. The frame changes image categories every 6 minutes. The Mega Frame is powered by a Raspberry Pi Zero W because I happen to have one, but any Raspberry Pi would probably work. I like the Pi Zero W because it has WiFi capabilities so I can develop the software remotely via SSH. I can even change the software while the Mega Frame is hanging on a wall in my house. I wrote all of the frame's software from the ground up in GForth because I like programming in Forth and I have found GForth really capable. Besides designing the hardware and software I built a box for the frame out of wood which I stained and waxed. The pictures below document the frame's build process.
Electrical Connections
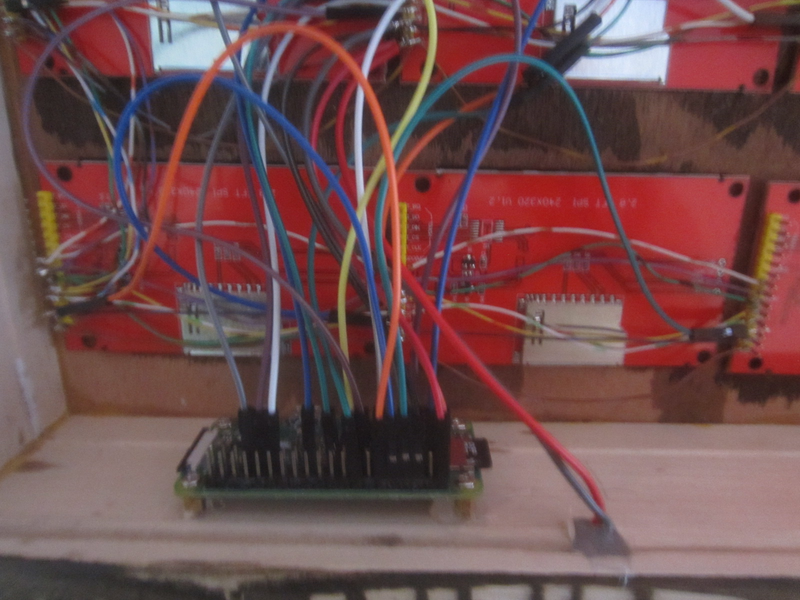
Connections between the Raspberry Pi Zero W and the other hardware which includes the 9 displays and the PIR motion sensor.
Displays are numbered left to right and top to bottom.
As you can see the signals +5 VDC, GND, RESET, D/C, MOSI, SCLK and BL are wired to each display in parallel.
Only the chip select pins are unique to each display.
The Raspberry Pi SPI interface is configured to run at 20 MHz.
The external 5V 1 amp power source (wall wort) is connected to +5 VDC and GND.
* I had to put a 2.2K ohm resistor in the BL (back light) signal line as I think the direct connection was causing a problem for the Raspberry Pi that resulted in corrupted images.
Mega Frame Software
All of the software for the Mega Frame is written in GForth which I have found very nice. The software is made up of many GForth files.
To understand how the code works requires a working knowledge of Forth and specifically GForth.
The files and a short description of their content is given below.
In addition to the GForth code there are numerous directories of images as described below.
Image must be in 320x240 32 bit BMP format.
Images in these directories must be named iN.bmp where N is 0 up to number of images in the directory minus 1.
Ex: i0.bmp, i1.bmp, etc.
There is a limit of 64 images per directory named i0.bmp .. i63.bmp. This has to do with limitations of the bitfield.fs code.
The following are the basic step you would need to take to reproduce the Mega Frame:
Note: If you plan to use more and/or different images you must understand the operation of the imageManager.fs code in detail.
************* Good luck building your own Mega Frame *************
Finally the Mega
Frame in OperationThe idea for this new project is to have a picture frame with, not 1, but 9, 2.8" LCD SPI displays; hence the name Mega Frame. The frame displays various categories of images that I have photographed, computer generated or collected over the years along with some misc computer graphics. It is motion activated in that the back lights for all of the LCD displays turns on when motion is detected to show the images and then turn off again after 3 minutes. The frame changes image categories every 6 minutes. The Mega Frame is powered by a Raspberry Pi Zero W because I happen to have one, but any Raspberry Pi would probably work. I like the Pi Zero W because it has WiFi capabilities so I can develop the software remotely via SSH. I can even change the software while the Mega Frame is hanging on a wall in my house. I wrote all of the frame's software from the ground up in GForth because I like programming in Forth and I have found GForth really capable. Besides designing the hardware and software I built a box for the frame out of wood which I stained and waxed. The pictures below document the frame's build process.
| Picture |
Description |
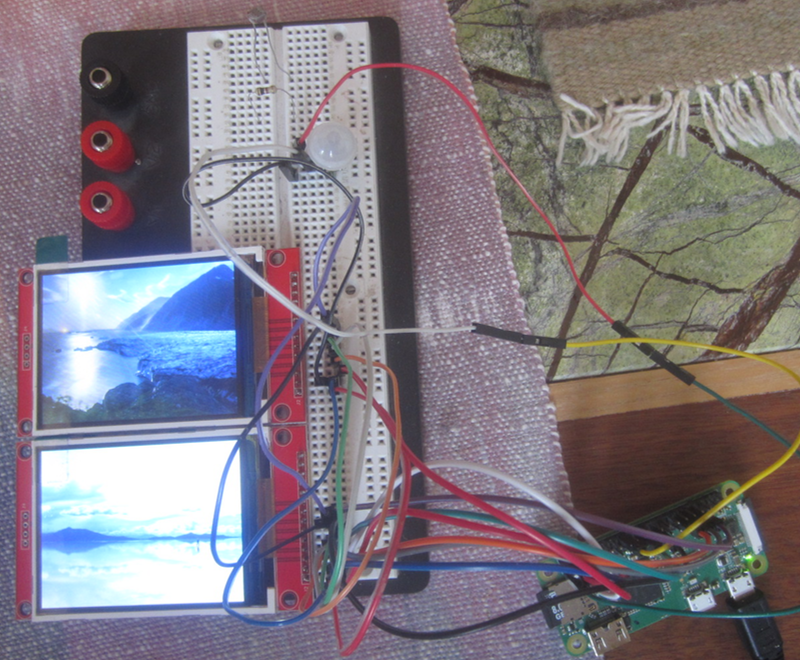 |
Here is the breadboard I used to verify my
design for the Mega Frame. On the left is the white
PIR motion detector and two LCD displays. On the
bottom right is the Raspberry Pi Zero W which is
powering the frame. The motion sensor is really sensitive so it will pick up any kind of motion over a great distance. Even across a room is some cases. The displays were bought at Aliexpress.com for $4.24 each which I thought was quite the deal. I ordered 13 when I only needed 9 to be sure but all 13 seemed, at first anyway, to work perfectly. These displays do not have touch support, that cost a little extra. |
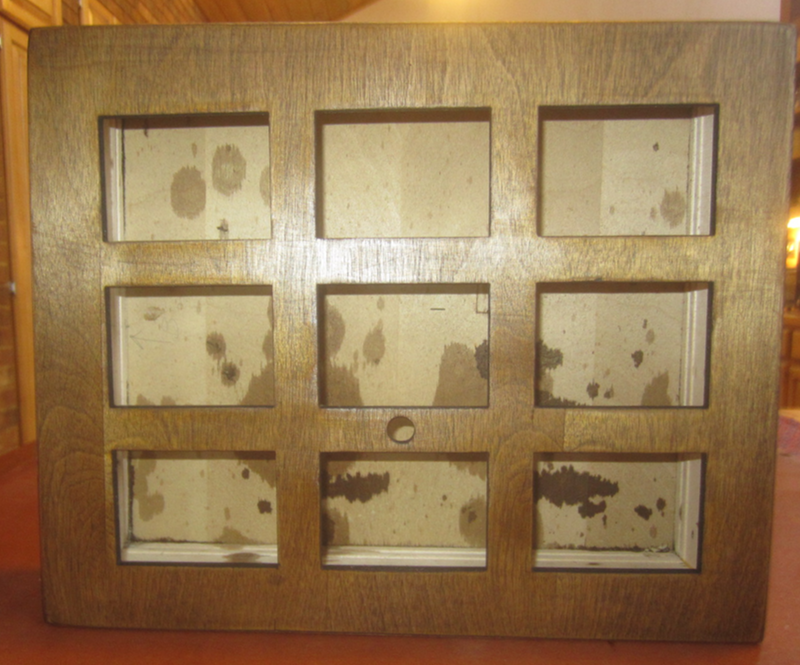 |
I made a frame like box to hold the 9 LCD
displays. It is made of pine molding for the sides
and 1/8" veneered plywood for the front and back.
The front plywood piece was cut out using my Ortur
laser cutter. After all of the machining, I glued
the front to the box and used a flush cut router bit
to trim the front to the sides. After that, I
stained the whole thing with dark walnut stain.
Finally, I coated all surfaces with wax. |
 |
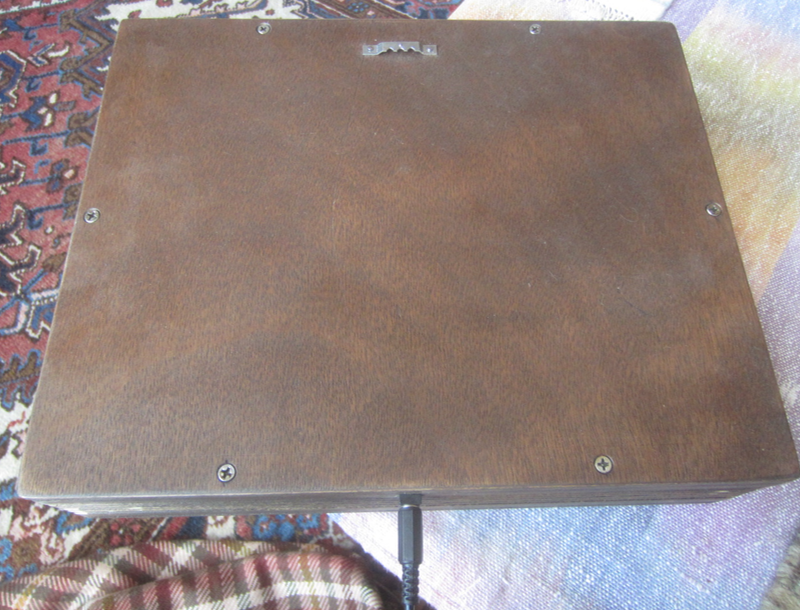
While the front of the frame/box is glued
on, the back is held on with screws for easy
assembly and future maintenance. I will add a frame zig zag mount so I can hang the finished Mega Frame on the wall. |
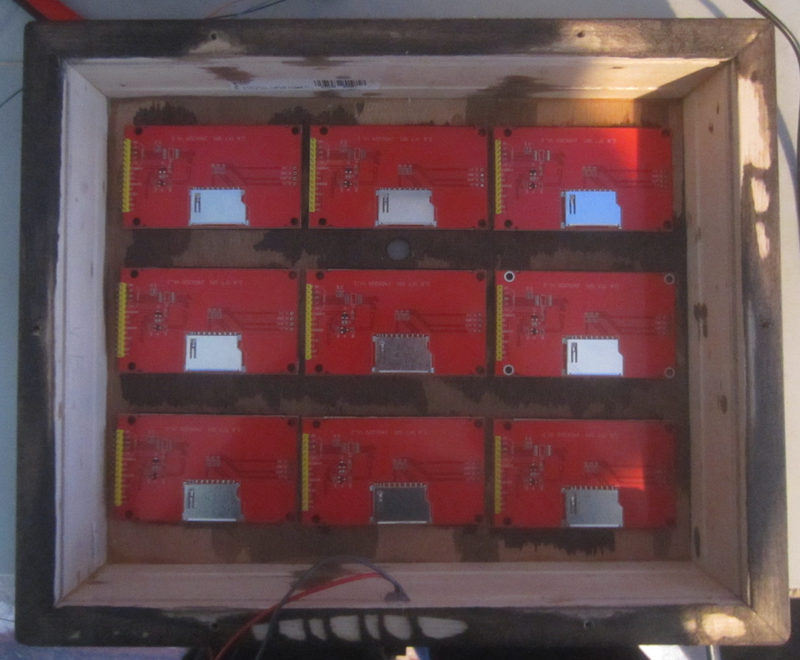 |
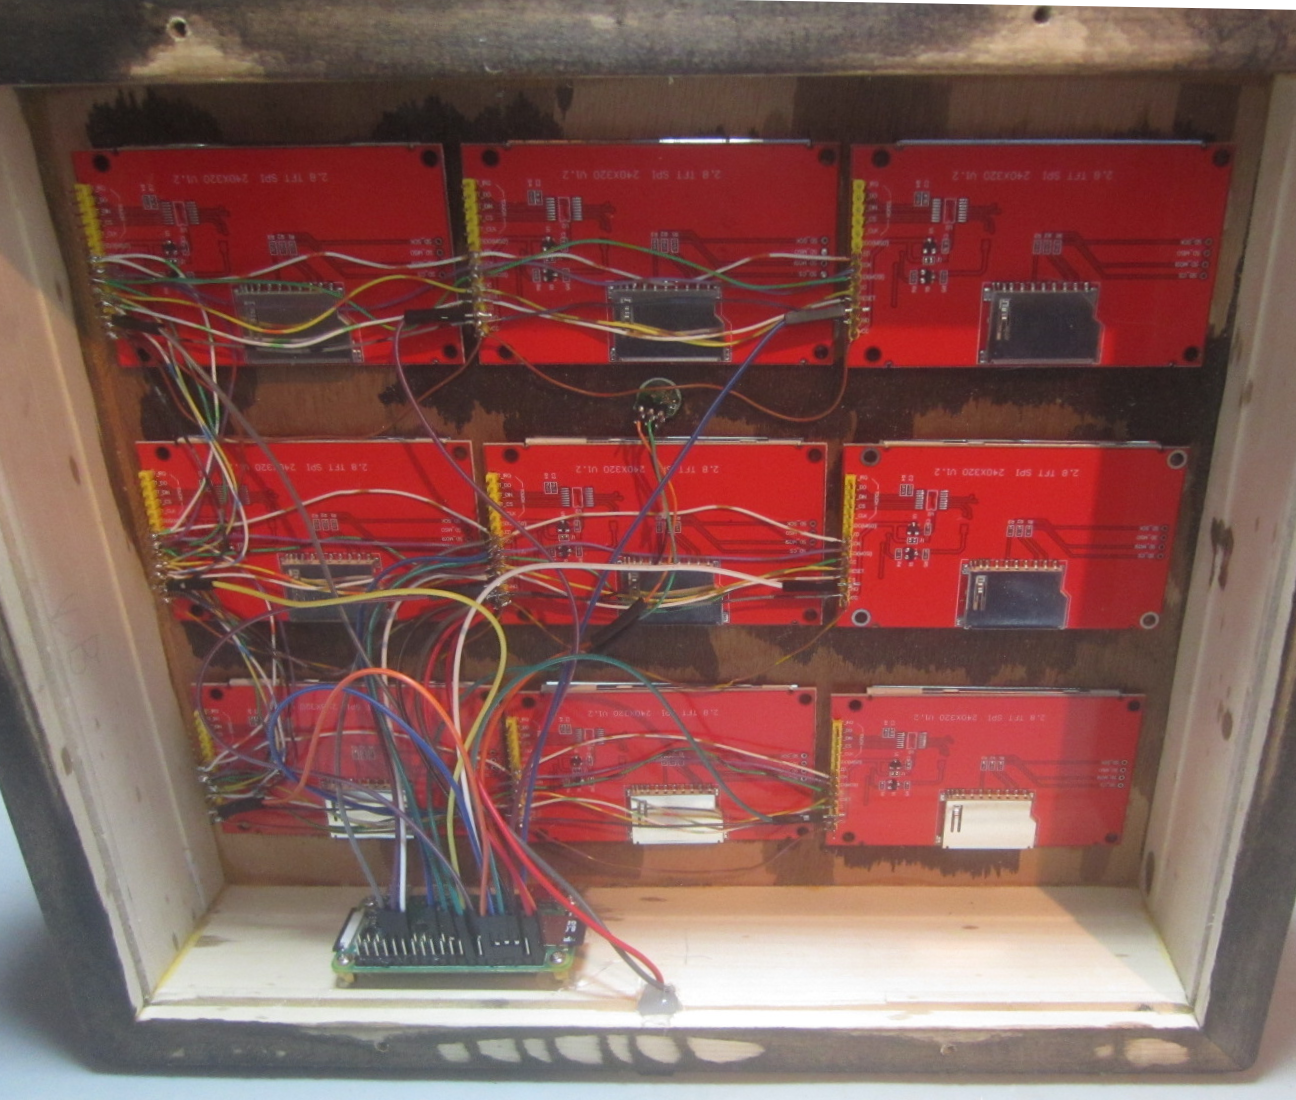
With the back off I mounted the 9 LCD
displays to the frame using hot glue. You can see
the power connector and wires at the bottom of the
frame. The frame will be powered externally by a 5
VDC wall wart. The SD card interface on each display module was not used in this project. All image files are stored on the SD card in the Raspberry Pi. |
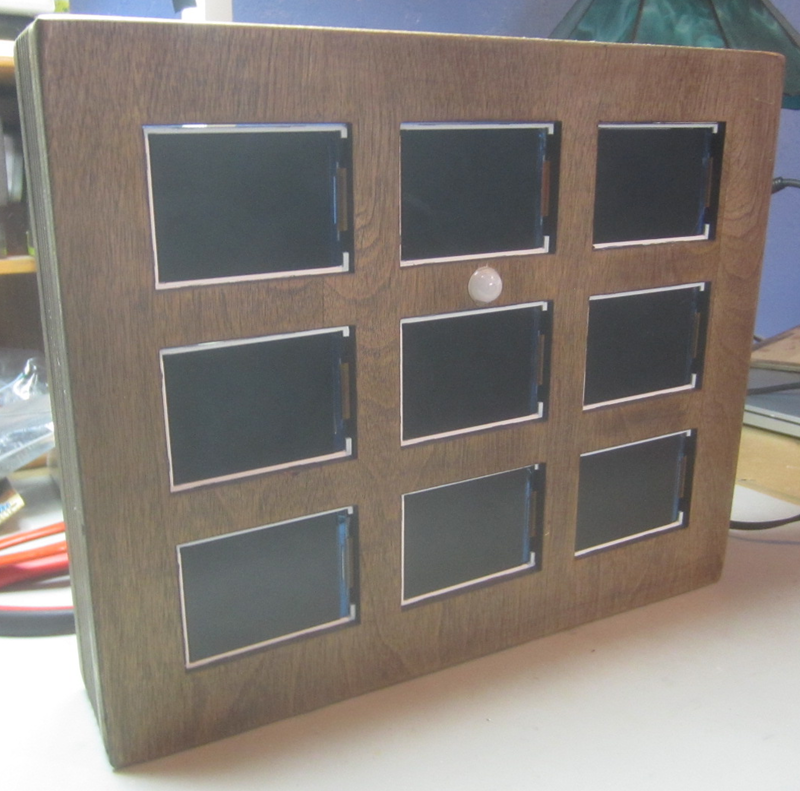 |
Front view of Mega Frame with all displays mounted. The white circle is the PIR motion sensor. The frame is starting to look real. It shouldn't be long now before I can see the first images. |
 |
The rats nest evolves. I used push on jumper wires for connection to the Raspberry Pi so I could remove it in the future if another project required it. Hopefully the Raspberry Pi shortage will be resolved in 2023 and I won't have to worry about wasting a Raspberry Pi Zero W in the future. |
 |
Done with all of the wiring. Unfortunately
the frame doesn't seem to work for some reason.
Tomorrow I will trouble shoot and find out why. I found a minor wiring error and now the frame works as expected. Time to button up the frame and call the hardware done. |
 |
With the frame's hardware checked out I
screwed the back on and will now concentrate on the
frame's GForth software. |
 |
I battled instability in the Mega Frame for
weeks. I found a couple of software issues and a
couple of bad solder joints but fixing them made
things better but the frame would still not run for
more than a day without issues. I thought the
instability was probably the result of one of two
issues: inadequate power supply and/or possibly heat
buildup within the frame. So I first changed the 5
volt power supply from a 1 amp to a 2.5 amp supply
but that did not fix the instability. So, in
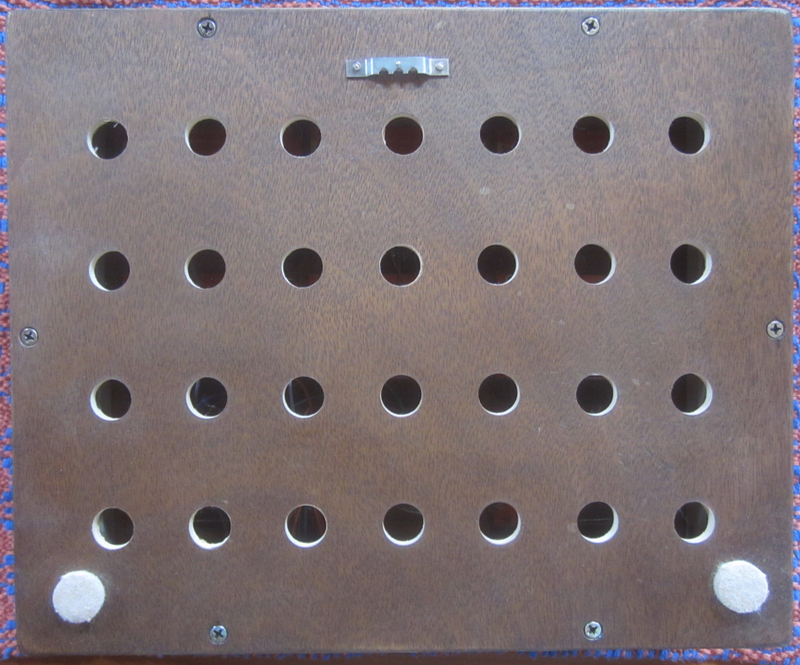
desperation, I took the back off the frame and
drilled a series of holes to allow for better air
circulation. At that time I put a couple of felt pads on the lower part of the back to prevent damage to the wall it hangs on and to allow better air flow. With the holes drilled in the back the frame ran for 3 1/2 days before the displays started malfunctioning so heat buildup might be the issue. This theory is further advanced because after the malfunction I can unplug the frame and plug it back in and it still won't work correctly. But if I leave it off for some length of time (~ 1 hour) I can plug it back in and it will run fine. So with that in mind, I drilled 3 holes in the top of the frame and 2 holes on each side and the bottom to further air circulation. I think I have finally found the actual problem with the Mega Frame and it is not heat. When I wired the SPI bus connections I didn't do it like a serial bus structure. Instead I wired the RPi Zero to the middle display and then had the signals fan out from there. This resulted in multiple paths for the high frequency signals that they did not like. Since I rewired the frame as a single continuous bus, the frame hasn't malfunctioned. I have my fingers crossed that the wiring topology was the actual problem. |
Electrical Connections
Connections between the Raspberry Pi Zero W and the other hardware which includes the 9 displays and the PIR motion sensor.
Displays are numbered left to right and top to bottom.
| Signal Name |
Pi Zero Pin |
Pi Zero GPIO |
Display 0 |
Display 1 |
Display 2 |
Display 3 |
Display 4 |
Display 5 |
Display 6 |
Display 7 |
Display 8 |
PIR |
| +5 VDC |
2 |
n.a. |
VCC |
VCC |
VCC |
VCC |
VCC |
VCC |
VCC |
VCC |
VCC |
|
| GND |
6 |
n.a. |
GND |
GND |
GND |
GND |
GND |
GND |
GND |
GND |
GND |
- |
| CS0 |
3 |
2 |
CS |
|||||||||
| CS1 |
5 |
3 |
CS |
|||||||||
| CS2 |
7 |
4 |
CS |
|||||||||
| CS3 |
11 |
17 |
CS |
|||||||||
| CS4 |
13 |
27 |
CS |
|||||||||
| CS5 |
15 |
22 |
CS |
|||||||||
| CS6 |
8 |
14 |
CS |
|||||||||
| CS7 |
10 |
15 |
CS |
|||||||||
| CS8 |
12 |
18 |
CS |
|||||||||
| RESET |
29 |
5 |
RST |
RST | RST | RST | RST | RST | RST | RST | RST | |
| D/C |
31 |
6 |
D/C |
D/C |
D/C | D/C | D/C | D/C | D/C | D/C | D/C | |
| MOSI |
19 |
10 |
MOSI | MOSI | MOSI | MOSI | MOSI | MOSI | MOSI | MOSI | MOSI | |
| SCLK |
23 |
11 |
SCK |
SCK | SCK | SCK | SCK | SCK | SCK | SCK | SCK | |
| BL * |
33 |
13 |
LED |
LED | LED | LED | LED | LED | LED | LED | LED | |
| +3.3 VDC |
1 |
n.a. |
+ |
|||||||||
| PIR OUT |
16 |
23 |
OUT |
As you can see the signals +5 VDC, GND, RESET, D/C, MOSI, SCLK and BL are wired to each display in parallel.
Only the chip select pins are unique to each display.
The Raspberry Pi SPI interface is configured to run at 20 MHz.
The external 5V 1 amp power source (wall wort) is connected to +5 VDC and GND.
* I had to put a 2.2K ohm resistor in the BL (back light) signal line as I think the direct connection was causing a problem for the Raspberry Pi that resulted in corrupted images.
Mega Frame Software
All of the software for the Mega Frame is written in GForth which I have found very nice. The software is made up of many GForth files.
To understand how the code works requires a working knowledge of Forth and specifically GForth.
The files and a short description of their content is given below.
| GForth Filename |
Function |
| bitfield.fs |
64 bit bit field functions used to guarantee
uniqueness in random numbers and random selections. |
| bmpReader.fs |
Code used to read 320x240 32 bit BMP image files
from the filesystem |
| colorfunctions16.fs |
Only the wheel function is used from this file
to create 16 bit colors for display |
| font5x7.fs |
Font used to draw text on the screens |
| frame.fs |
Main code for the Mega Frame. The "main" word is
the entry point for code execution |
| imageManager.fs |
Code for managing the directories of image files |
| load |
A GForth include file for loading all of the
Mega Frame software |
| loadrun |
GForth include file for loading and executing
the Mega Frame software |
| mdGraphics.fs |
Functions for drawing circles and lines on the
virtual multi display screen |
| mdILI9341.fs |
A display driver for ILI9341 display devices
extended for controlling 9 displays |
| misc.fs |
Various array definitions and other things
required for the frame's operation. |
| random.fs |
GForth C interface to Linux random functions |
| text.fs |
Code for drawing text strings on the displays |
| wiringPi.fs |
A library of functions for controlling the
Raspberry Pi's GPIO pins and the SPI interface(s). |
In addition to the GForth code there are numerous directories of images as described below.
Image must be in 320x240 32 bit BMP format.
Images in these directories must be named iN.bmp where N is 0 up to number of images in the directory minus 1.
Ex: i0.bmp, i1.bmp, etc.
There is a limit of 64 images per directory named i0.bmp .. i63.bmp. This has to do with limitations of the bitfield.fs code.
| Directory Path |
Content |
| images/abstract |
A collection of abstract images most of which I
have generated over time. |
| images/amazing |
A collection of amazing images I have collected
from the Internet. |
| images/fractals |
A collection of fractal images I have created
and/or found on the Internet. |
| images/garden |
A collection of images of the Garden of the Gods
Park in Colorado Springs. One of the most beautiful
parks in the world as far as I am concerned. These
are a combination of pictures my wife and I have
taken plus many from the Internet. |
| images/psychedelic |
A collection of psychedelic and surreal images I
have collected over the years. |
| images/raytraced |
A collection of ray traced images most of which
I created but there are a many I gathered from
elsewhere. |
| images/space |
Being a Space fan I have gathered quite a
collection of space images some of which are
provided here. |
| images/volcanoes |
I am fascinated by Geology so I have collected
quite a number of images of volcanoes and hot
springs over the years. |
The following are the basic step you would need to take to reproduce the Mega Frame:
| 1. Install the latest non GUI 32 bit version of the Raspberry Pi operating system on an SD card |
| 2. Install
GForth and wiringPi (with its required
prerequisites) |
| 3. Create a
gforth directory off of your home directory |
| 4. Unzip the provided Mega Frame software into the gforth directory. The software for the Mega Frame can be found here. You may want to check back periodically as I am constantly changing the software to fit my whims (;>) |
| 5. To test
the install change to the gforth directory and
execute: gforth-fast loadrun and see what
happens. |
| 6. If all is
well, read the service.txt file in the
resource/service directory about how to make the
Mega Frame code run as a Linux service that will
restart every time the frame is powered up. |
Note: If you plan to use more and/or different images you must understand the operation of the imageManager.fs code in detail.
************* Good luck building your own Mega Frame *************
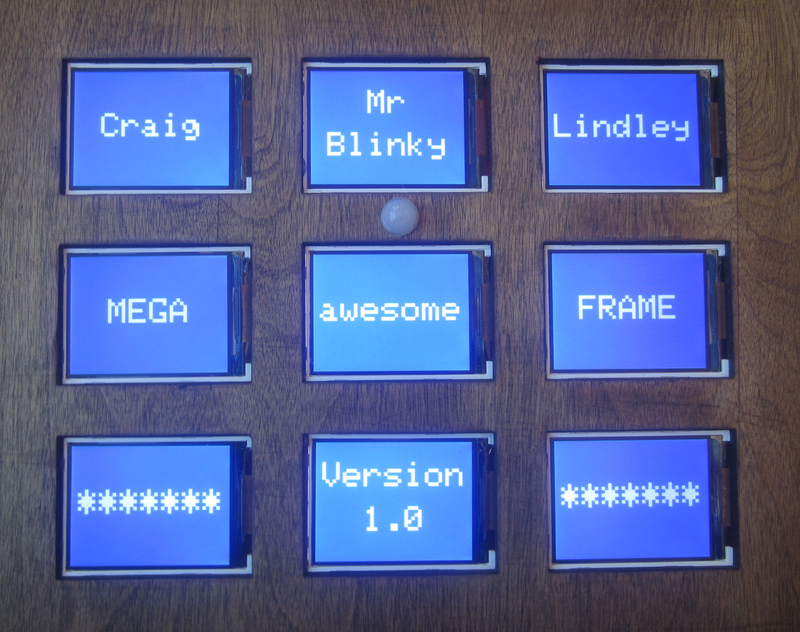 |
When the frame is powered up it displays this
introduction screen. After power up this pattern is
just one of the various display patterns that gets
displayed sequentially. My friends call me Mr. Blinky because of all the project I build, most of which contain blinking lights of some type. |
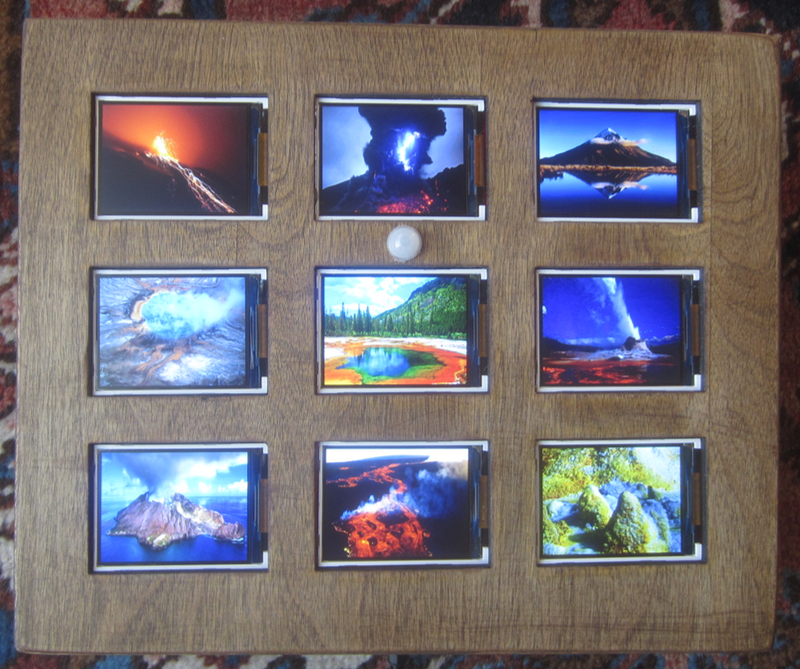 |
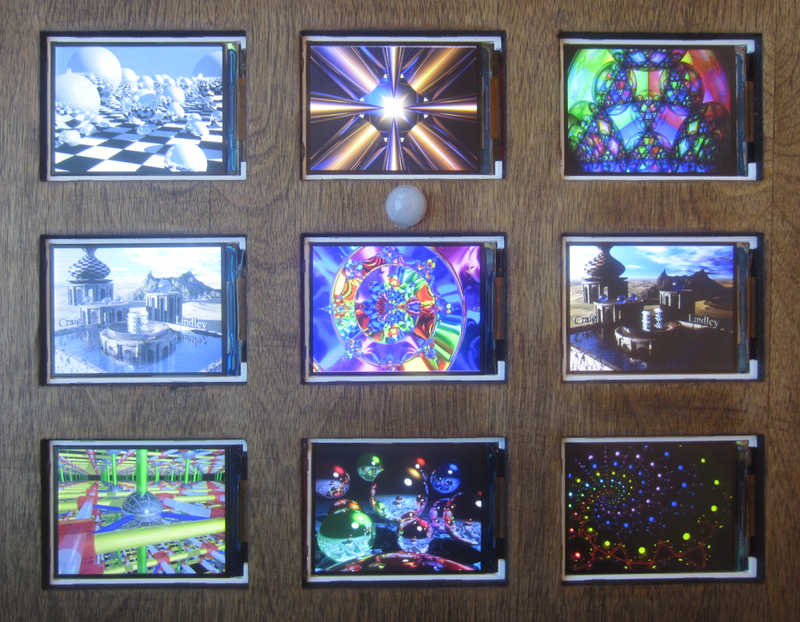
Here you can see the Mega Frame in operation. It
is currently displaying my collection of volcano and
hot spring images. Each image takes about 4 seconds to update. The display to be updated is selected randomly so you can never know which image is going to show up where. Images are also selected randomly with effort made to not display the same images simultaneously. As mentioned, images have to be in 320x240 resolution to display correctly. There are 15 different modes/patterns the frame runs which are displayed sequentially. |
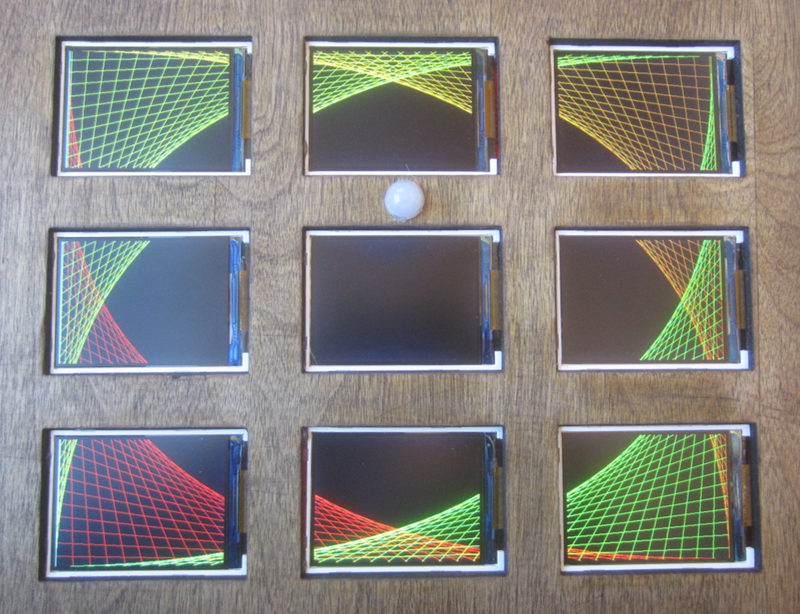 |
A web pattern which uses the 9 individual LCD
screens as one virtual 960x720 screen. |
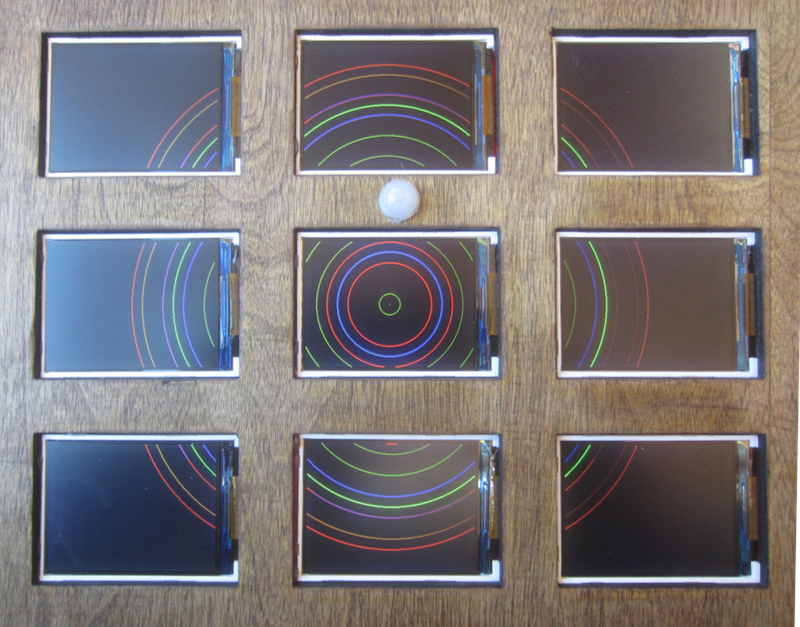 |
Another virtual screen pattern. |
 |
Here is another picture of ray traced images
displayed on the Mega Frame. I guess it is time to hang the Mega Frame on a wall so I can enjoy it. I guess I can call the project complete. I think this project turned out well and the images are displayed very brightly which makes the overall presentation beautiful. |
Questions and comments to me Craig at: calhjh@gmail.com