January
2022
I went to visit my cousin the other day and he had a NanoLeaf creation on his wall that I really admired. Being the DIYer that I am (and the cheapskate) I decided to try and build something along the same lines. In looking around on the Internet for inspiration, I came upon this project on Instructables.com:
https://www.instructables.com/3D-Print-Your-Own-Nanoleaf-Project-Alexa-Hue-and-A/
which was almost exactly what I was looking for. I wanted something smaller than an actual NanoLeaf and this fit the bill nicely. I used the STL files provided in the instructable for the triangle bases, sides and control box but created a new design for 3D printing the diffusers. In other words, I 3D printed the diffusers using a semi transparent filament instead of using translucent acrylic as used in the Instructable. I also decided that I wanted to have a triangular overall look which would require 15 triangles in total. It took around 75 hours of printing time for the whole project. Here is a picture of the finished TriLight device hung on my wall. The black box in the lower right contains the electronics.
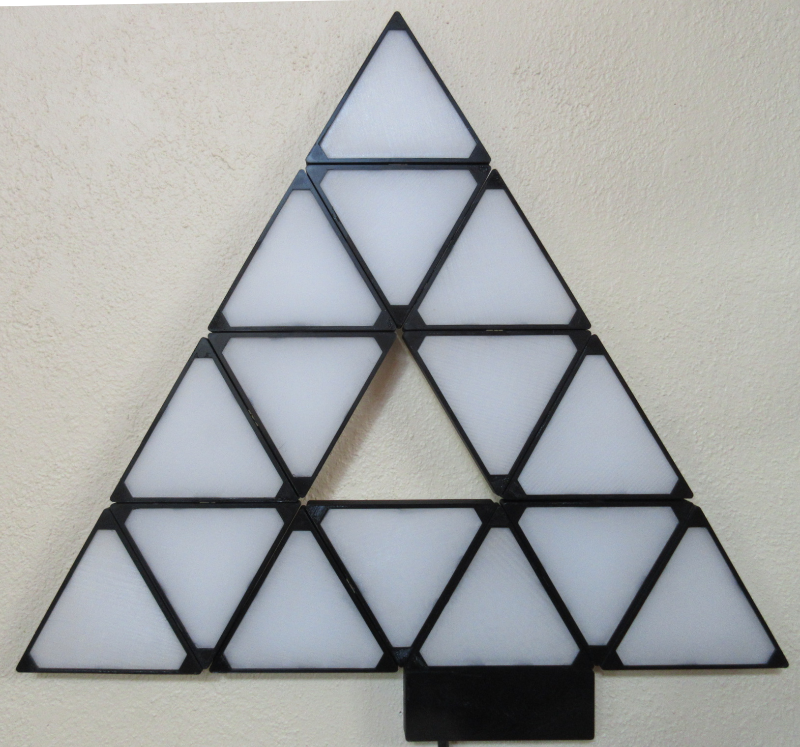
Each triangle contains a strip of 12 NeoPixels for a project total of 180 NeoPixels which would need to be controlled. I did not use the controller or the software described in the article. Instead I used an ESP32 micro controller I had on hand and custom software I had written for a previous project. Of course the software had to be enhanced to take advantage of lighting patterns that presented themselves due to the triangular nature of the project. In total there are about 40 lighting patterns that can be selected to run via a web page and an auto mode that picks the patterns, speed and brightness randomly. The auto mode selects a new pattern every 30 seconds and turns off the display completely after 15 minutes.
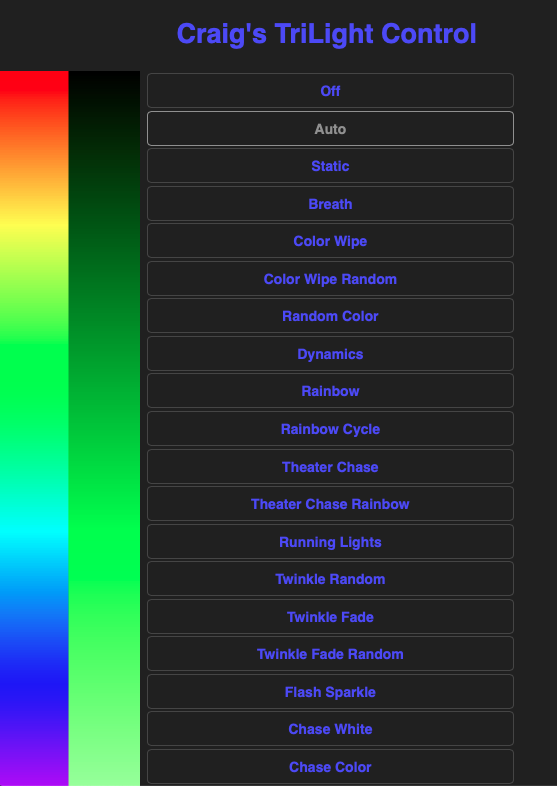
You can control the TriLight from any device that has a web browser. Here is a portion of the web page used for control. Besides pattern selection you can also control the color, saturation, speed and brightness of many of the patterns. If the Static pattern is selected the TriLight can be used as a wall light of any color you choose.
The video below shows the completed TriLight project in operation running in auto mode. Note, because of the randomness built into the auto mode no auto mode lighting sequences will ever be exactly the same and many will be very surprising.
NOTE: my camera had a rough time making this video due to the highly dynamic nature of the lighting of the piece.
Enjoy the show !
The STL files for the 3D printed parts for this project are available here. The code for the ESP32 is available here. The code implements the Arduino over the air (OTA) update mechanism so the TriLight doesn't need to be directly plugged into a computer to update the software. This means it can stay on the wall while being updated which is a good thing for the somewhat fragile TriLight device.
Questions and comments to me Craig at: calhjh@gmail.com