 |
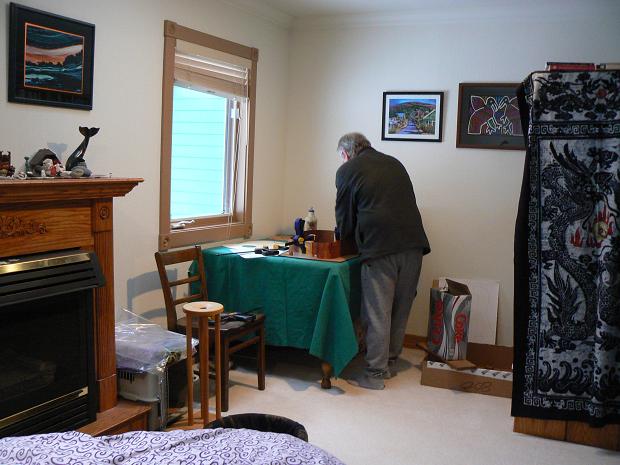
Because it has been so cold this winter
(2006/2007) I
decided to build
the guitar in a make shift wood shop in my bedroom instead of in
the garage. This was necessary for control of both temperature and
humidity. It wouldn't be good for the wood glue to freeze while it is
drying. |
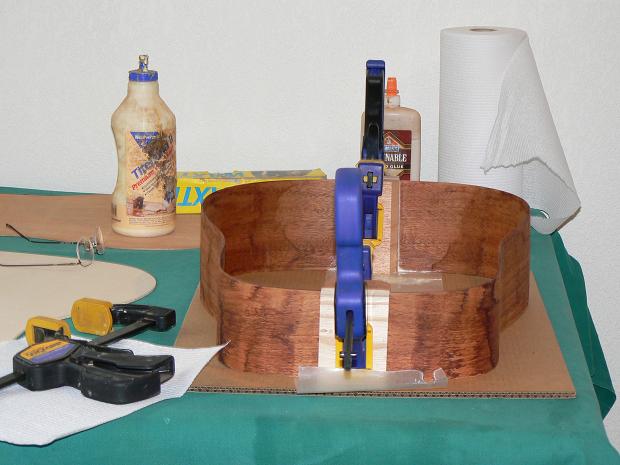 |
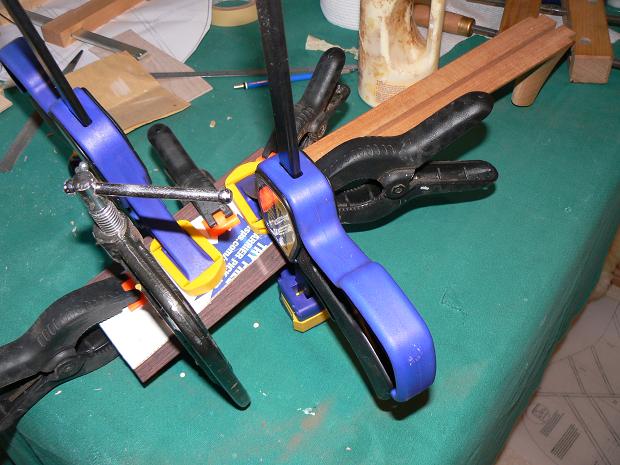
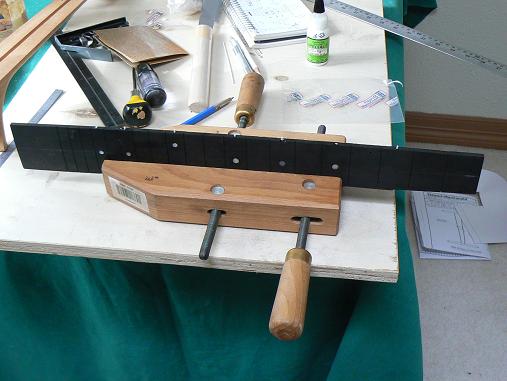
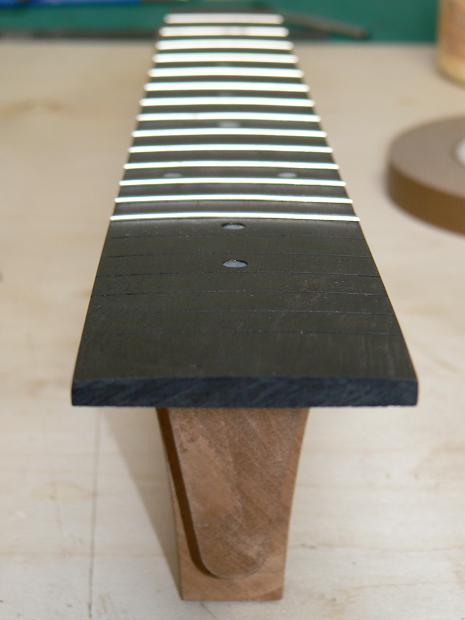
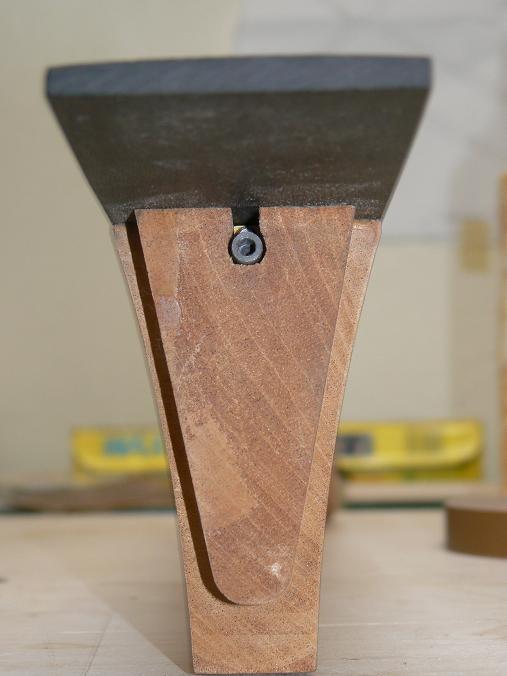
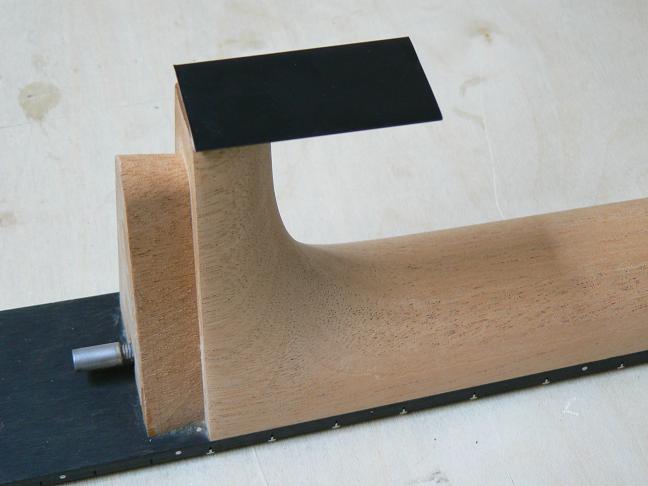
Step one was to glue the two pre-bent mahogany
sides to the
neck and tail blocks. I had to make some custom cauls to do this
clamping at the proper angles. Wax paper prevents the glue from
sticking to the clamps |
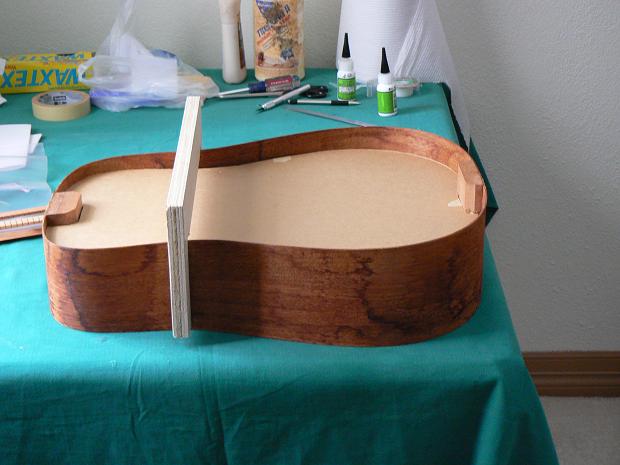 |
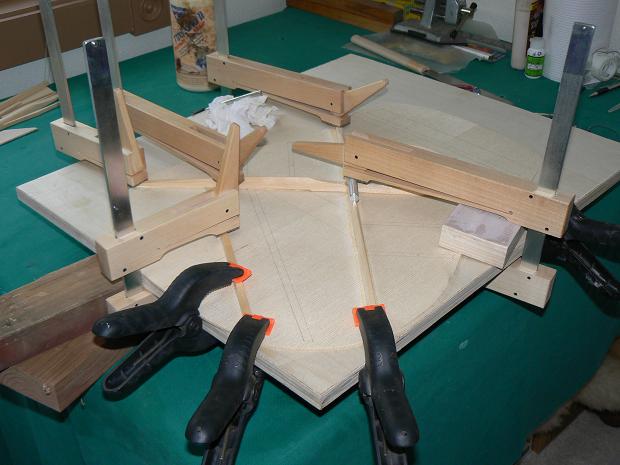
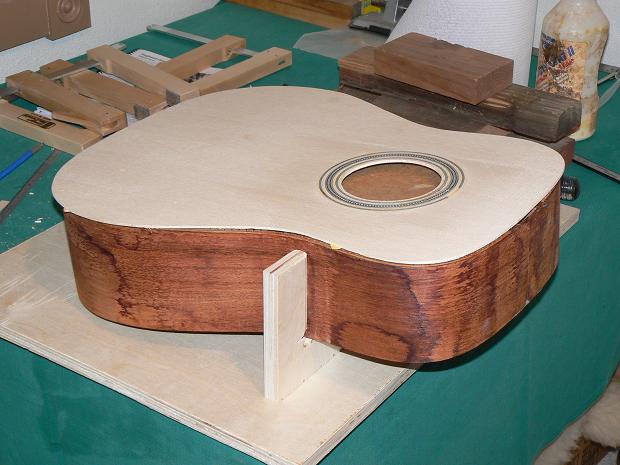
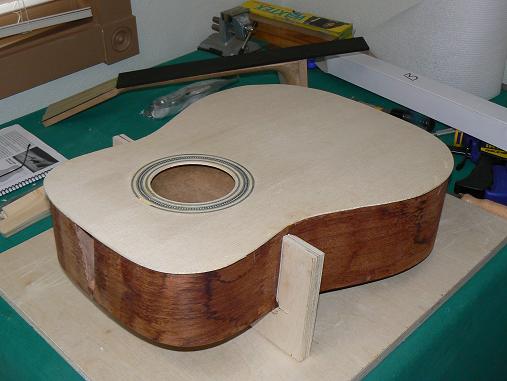
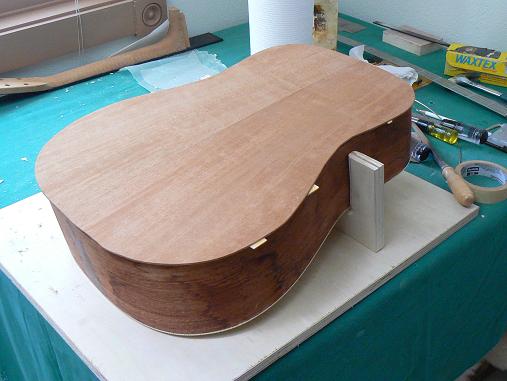
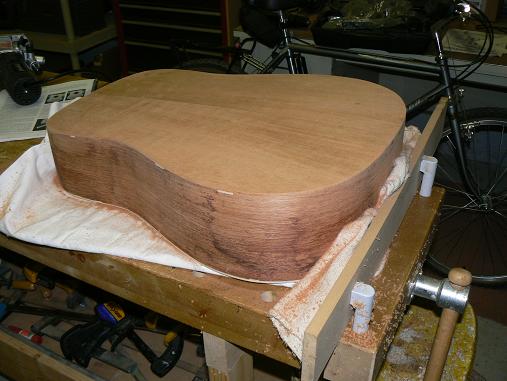
Once the sides were dry I made an internal mold
out of two
layers of heavy cardboard separated by wooden spacers. The shape of the
mold
was determined from the blueprints of the guitar. I made
the external U brace out of 3/4" plywood. The combination of the
cardboard mold and
U brace forces the classic dreadnought shape. You can see the water marks on the side of the guitar from the steam bending process. They will be sanded out later. |
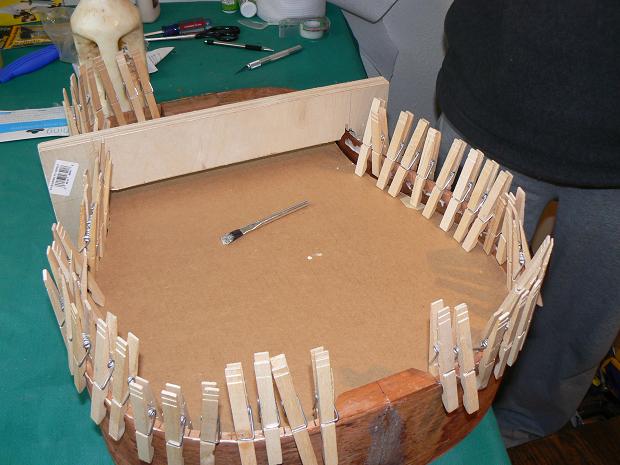 |
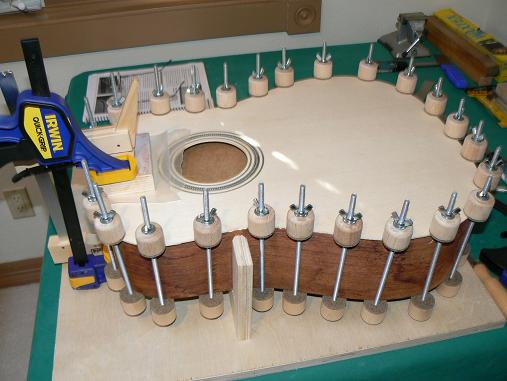
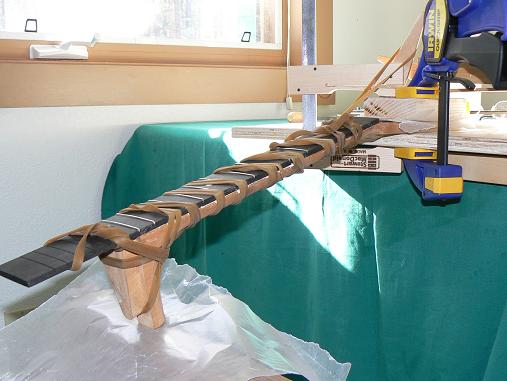
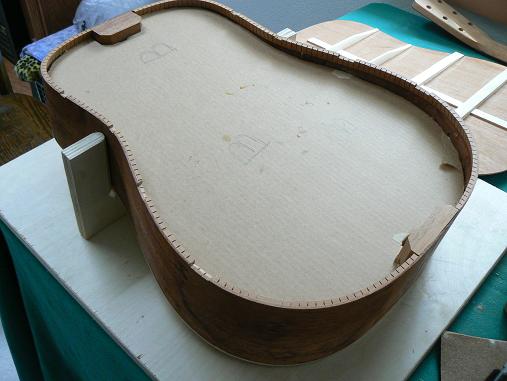
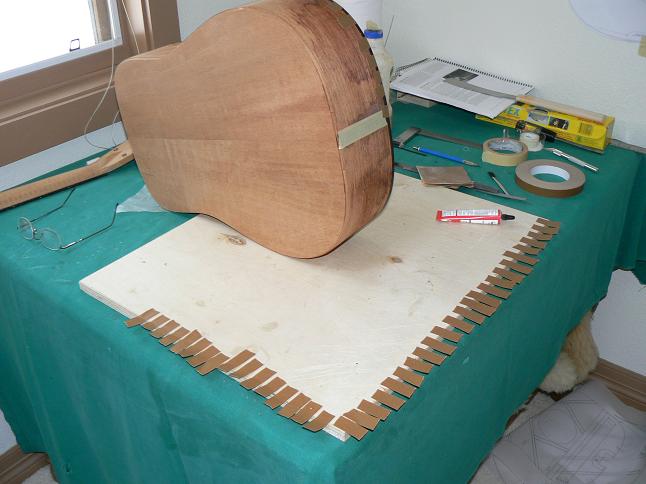
Yes, clothes pins do come in handy while making a
guitar.
Here they are used as clamps to glue the kerfed lining to both the top
and bottom of the sides. Kerf linings are made of mahogany with slots
cut into it at .25" intervals so that it can be bent around corners.
The kerfs increase the gluing area for the soundboard and back without
increasing the mass of the sides too much. |
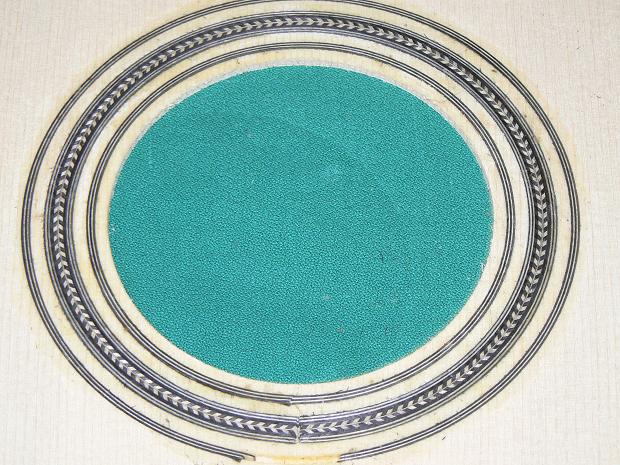 |
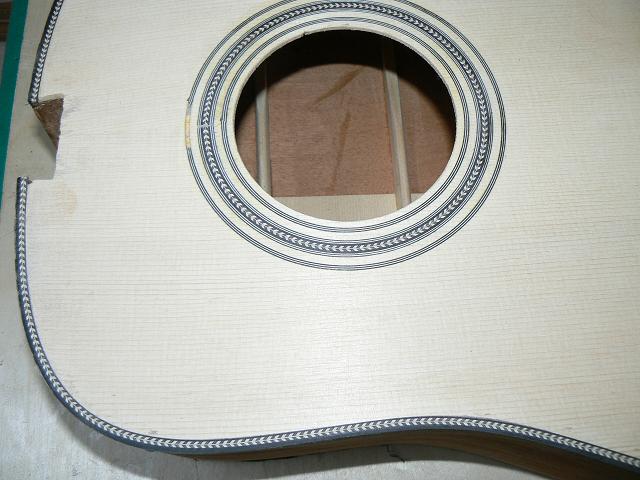
Here I glued the hairingbone trim pieces into the
routed
circles on the sound board (or guitar front). They don't need to go all
of the way around because they will be covered by the fretboard. |
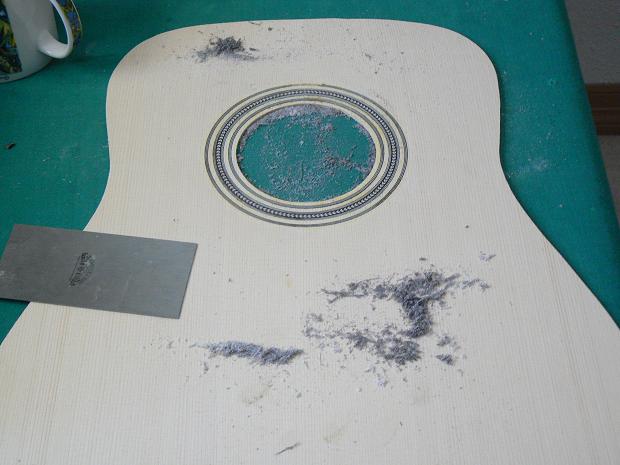 |
Once the glue dried, I used a scraper to smooth
the trim
strips to the surface of the sound board. This was my first experience
using a scraper and it worked really well. |
 |
In this step I glued a piece of rosewood veneer to
the
headstock. You can see the partially machined neck in the background.
The neck has a slot which will contain the adjustable truss rod. A
truss rod allows the neck to support the tension of the strings while
keeping the correct geometry with guitar body. As you have probably guessed by now you need a lot of clamps to build an acoustic guitar. |
 |
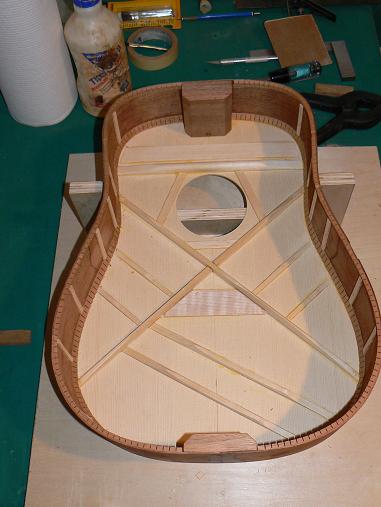
This guitar utilizes the X brace system used in
Martin and
other guitars. Each brace must be shaped and sized to the blueprint.
Here I have begun gluing some of the braces to the soundboard. Cam
clamps come in very handy here because of their deep throats. Many of the cross braces have to be fitted under the X braces. This means a 45 degree angle is filed onto the end of the brace and a matching slot is filed into the X brace. You cannot really see that in this picture. |
 |
Here is the first time the sound board and the
sides have
met. You can see the braces extending out from the soundboard. Slots
must be filed into the kerfs to allow the braces to extend into the
sides for maximum strength and energy transfer. |
 |
Here is the back of the sound board with all of
the braces
glued into place. The braces are made out of spruce as is the
soundboard. The trapezoidal piece of hard maple in the middle underlies
the bridge for
extra strength. |
 |
With the braces fit to the sides, the soundboard
can be
glued to the sides. As you can see many specialized clamps are used
during the gluing. At this stage it is very important that the
soundboard and the sides form a perfect 90 degree angle. This is
accomplished by driving wedges into the cardboard mold at the proper
locations. Even with all of the care I took to keep the angle correct I still had troubles later when I fit the neck to the completed body. |
 |
After the glue dried, I used a flush cut router
bit to trim
the excess material from the soundboard so it fits the sides perfectly. |
 |
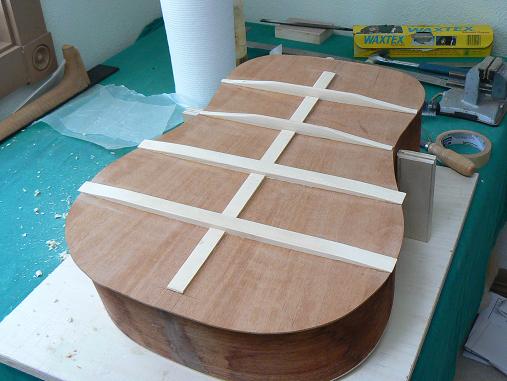
Now its time to start working on the back of the
guitar.
You'll notice that the bracing pattern on the back is much simpler than
on the front. The back braces are made from spruce as well. The back of
the guitar is sloped 5 degrees from top to bottom and left to right.
This sloping is accomplished by clamping the back and the braces with a
custom caul of the correct shape. The slope of the back makes routing
of the binding slots more difficult as I soon found out. |
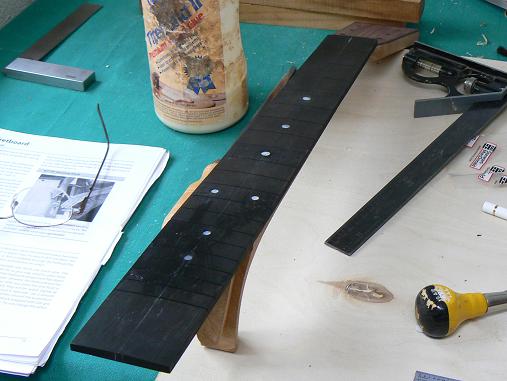 |
Here I'm working on the fretboard. I had to
layout, drill
and glue the mother of pearl dots into place. I didn't use the dot
arrangement specified in the kit, I used an arrangement that made more
sense to me. The fretboard is made from ebony and was pre-slotted for the frets which I will add later. |
 |
Additional small dots are drilled and filled with
a short
length of plastic rod. The position of the small dot match the position
of the large dots on the fretboard. These small dots allow a guitar
player to know where he/she is at on the fretboard. |
 |
Here is the completed bracing on the back. The
back is thin
mahogany. The curves from top to bottom and left to right cannot be
seen in this picture but the back can easily be rocked because of the
angles. |
 |
After fretting the fretboard to the 14th fret the
fretboard
is glued to the neck. Because the frets in the fretboard cause the
fretboard to bow it is necessary to put a reverse bow into the neck so
they cancel out. To do this, the headstock is clamped to the work table
and the heel of the neck is propped up from underneath. Two very large
rubber bands are wound around the neck to hold things together while
the glue dries. |
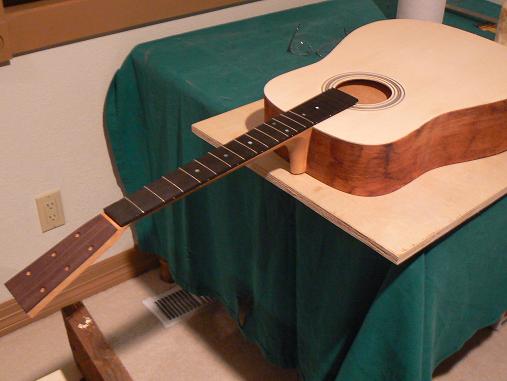 |
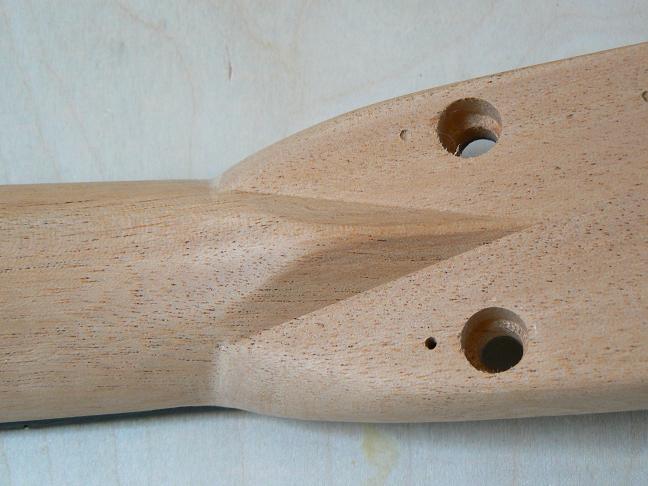
The neck is held onto the body of the guitar by a
dovetail
joint. This is the first time the neck was mated to the body. It is
starting to look like the real thing. You can see I have drilled out
the head stock to accommodate the tuning heads. |
 |
Next step is to fit the back onto the
sides. As with
the front, the braces extend out through the sides. The braces have to
be trimmed down to .1" as they extend through the sides. |
 |
Fitting continues |
 |
Here you can see the slots filed into the
kerfs/sides for
the
braces on the guitar back to extend through. |
 |
With the back fitted to the body, the cardboard
mold is cut
out of the body and side reenforcement strips made of spruce are glued
onto the side between the kerfs at regular intervals. |
 |
The back is then glued onto the body. |
 |
You can see the back braces extending through the
sides and
the surplus material of the back that will be trimmed off. |
 |
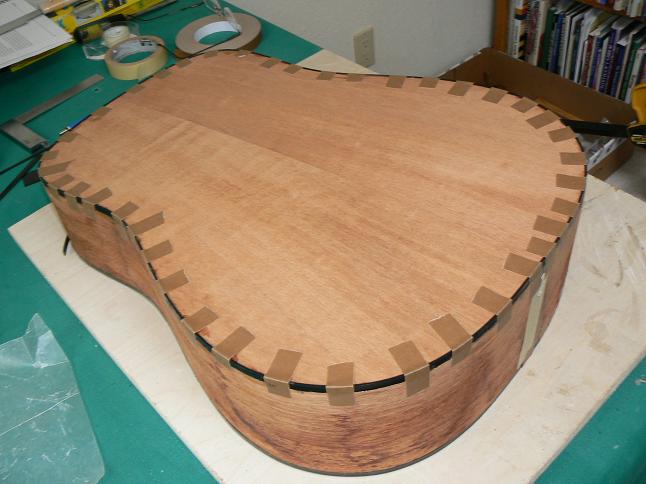
A small hand held router (thanks Ray) was used to
trim off
the excess
material from the
back and then the binding slots are routed into the body. The binding
on the front of the guitar is made of two pieces: a hairingbone strip
and a black binding strip. This required two slots to be routed. The
back binding is a single black binding strip. Routing the front is
easier because the soundboard is effectively flat. The back however is
sloped in two directions which requires a 5 degree wedge to be attached
to the router base so that the binding slots are at the correct angle. This was the scariest operation I had to perform so far. Routers are notorious for chipping out pieces of wood because of the direction of bit spin. To lower the odds of this happening, I did climb cuts (moving the router in the direction opposite that it typically moves) to route out the troubled areas and then did a uniform forward pass with the router all around the guitar body to finish up. Boy was I glad when this step was finished. A chip out here could have made my guitar into firewood. |
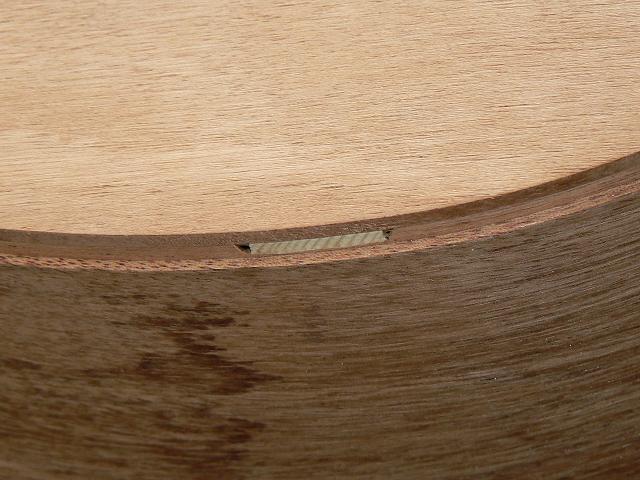 |
Here is a closeup of the back's binding slot. You
can see
the back brace. |
 |
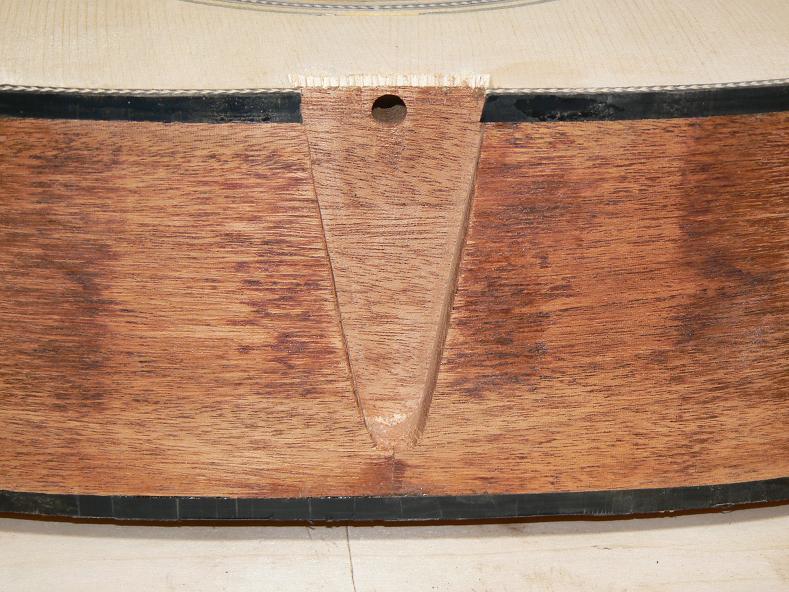
Next a strip of binding material is shaped into a
wedge and
a slot is cut in the back of the guitar over the sides seam for it. The
binding is then glued into place. The slot is cut using a very sharp
chisel. |
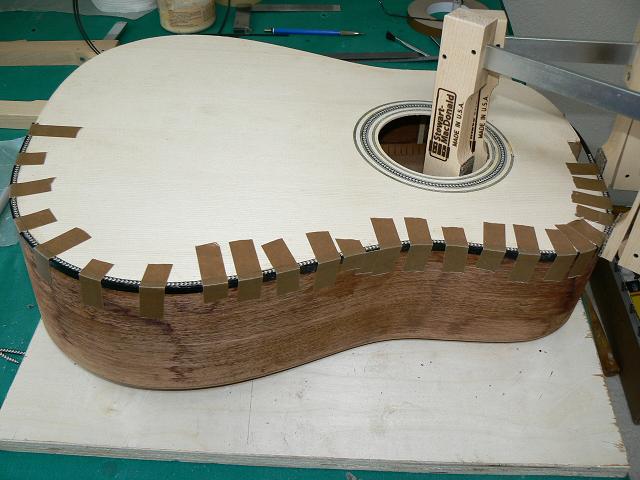 |
Here is the start of the binding process. The two
pieces of
binding material (the hairingbone piece and the black binding) are
glued into their appropriate slots and tape is used to
hold the binding in place while the glue dries. This was a difficult
operation because the hairingbone strip broke on me numerous times. It
doesn't like to conform to the shape of the guitar. |
 |
I finished the front binding and I'm getting ready
to do the
back binding. As you can see you use a lot of tape in this process. The glue is also very toxic which I learned the hard way. Boy did I get a buzz/headache gluing the binding on. I cannot believe people sniff glue for fun. |
 |
I've completed gluing the back binding and am
waiting for
the glue to dry. A heat gun must be used to heat the tape before pulling it off otherwise the tape will pull the wood apart. |
 |
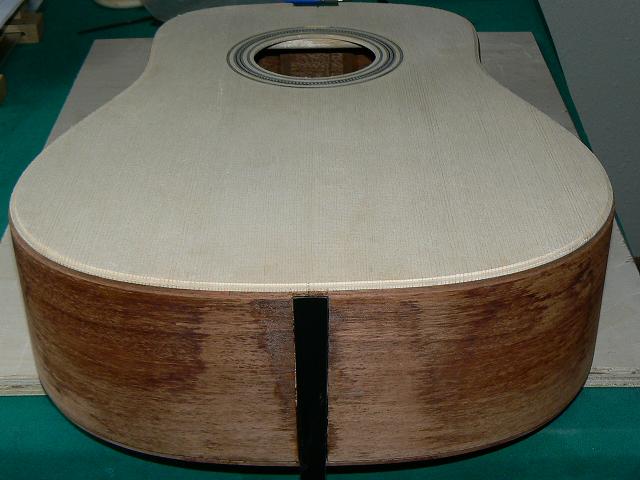
Here I've scrapped the front binding level and it
turned out
pretty good. Unless you look real close you cannot see where the
binding broke during gluing. |
 |
This is the cleaned up dovetail joint in the body.
The hole
is for truss rod adjustment. |
 |
Here is a view of the neck that shows the male end
of the
dovetail joint. You can also see that I haven't finished fretting yet. |
 |
Another view this time from the bottom. You can
see the
truss rod adjustment screw. The next step in the construction process
is fitting and aligning the neck to the body. Things
need to be adjusted so that the neck is directly in line with the
bridge of the guitar. This is done by shaving material off the sides
of the dovetail joint and putting thin wooden shims on the opposite
side. At this time the neck pitch is also adjusted so that a ruler held
over the fretboard just clears the bridge. |
 |
The fingerboard turned out wider than I wanted it
so I
sanded it and the neck down with my disc sander to a size that will be
easier to play. This had the added benefit of removing some marks I
accidentally made on the side of the ebony fretboard while filing the
frets. Next I had to do some carving on the neck to give the diamond the correct shape and size. The carving was done with chisels and files followed by sandpaper. It turned out good, the neck feels good in the hand. |
 |
Once the neck was sanded to 220 grit, I glued the
end cap
material on the heel of the neck. This is shaped in the next step after
the glue dries. |
 |
The heel cap is shaped to the neck heel. All of the dove tail joint area was then cleaned up to remove spots of glue in preparation for fitting the neck to the body. |
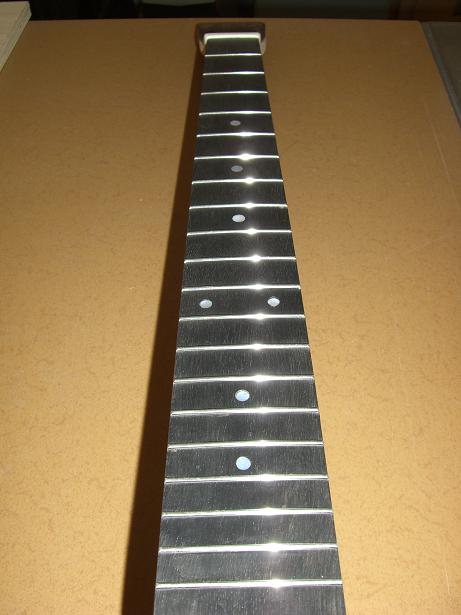 |
I completed the fretting in
preparation for attaching the neck to the guitar body. Nice shinny new frets on the ebony fingerboard. |
 |
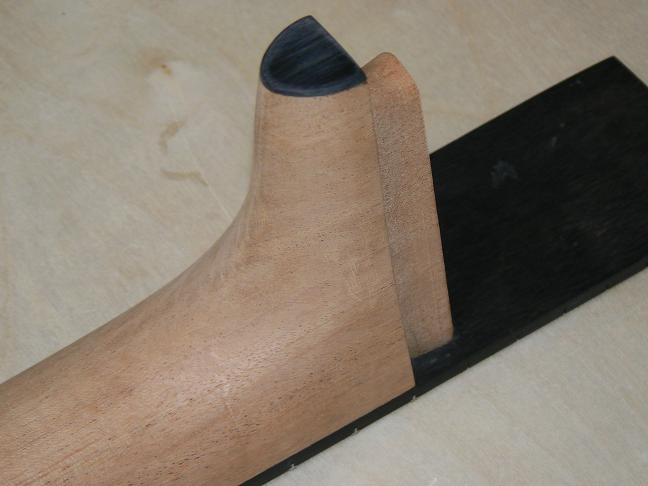
Next, I had to carve a bone blank for the nut of
the guitar.
I also had to carve out the slot for the nut to fit into. For this
operation I had to make a saw guide for guiding the saw at the correct
angle. Then a
Japanese saw and chisels were used to fashion the slot. This meant
cutting through the rosewood veneer on the top of the neck. This was
nervous work. |
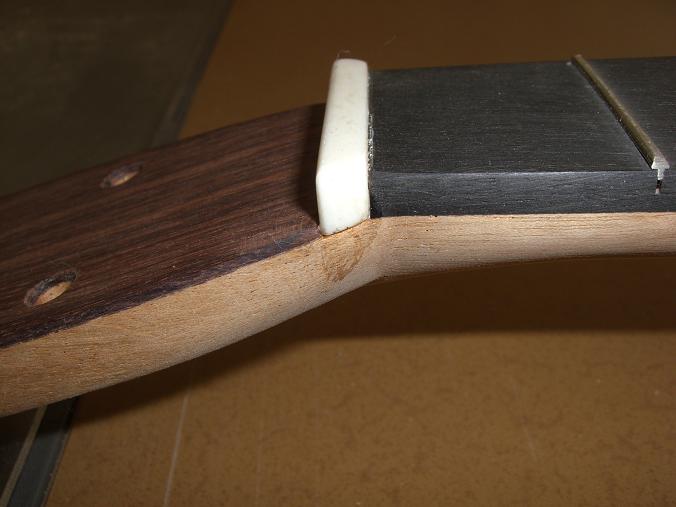 |
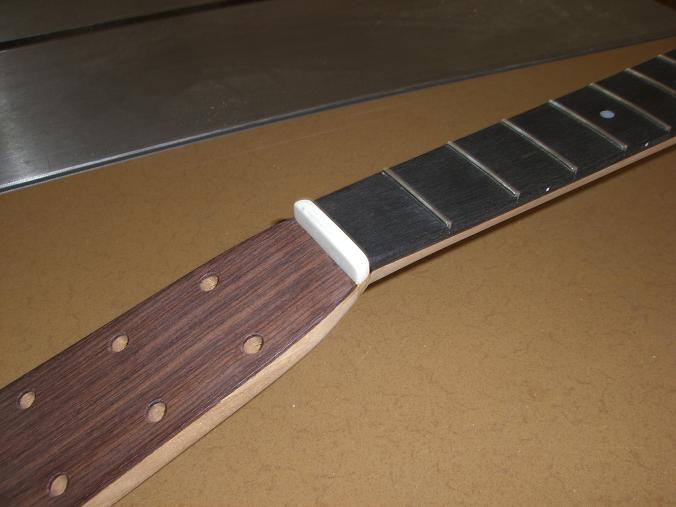
With
the nut shaped and
fit, it was then lightly glued into place. It was lightly
glued
because the nut may have to be removed some time in the future for
repairs or replacement. Slots in the nut for the strings will be cut
when the action is set. In this photo you can see the 15 degree angle at the bottom of the nut and a little glue residue that will be sanded off later. |
 |
The most
difficult operation yet
in building this guitar was getting the neck and the body to fit
together. In all I worked on this for over three weeks off and on. It
was major frustrating. The dove tail joint has a lot of faces where the
neck and the body meet. I would get one side of the joint to fit
correctly and then the other side would be 1/8th inch off. I had to
continually carve off portions of the joint to try the fitting again.
The problem was caused because the female side of the dove tail wasn't
exactly plumb with the guitar sides so the neck couldn't fit correctly.
I reached a compromise in the fitting and decided to go ahead and glue
the neck into place. There are small gaps between the neck sides and
the body
which I will attempt to fill during the finishing of the guitar. Because of all of the joint trimming the neck is approximately 1/8th shorter than it should be but that can be compensated for by moving the bridge back the same distance. Next time I may use a bolt on neck instead of a dove tail neck because you just crank the neck bolts down until the neck pulls into place. From what I understand, bolt on necks are much easier to deal with. Oh well live and learn. |
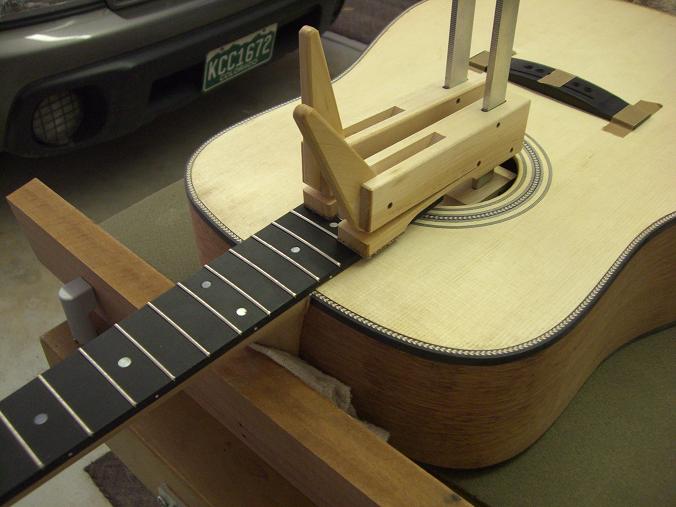 |
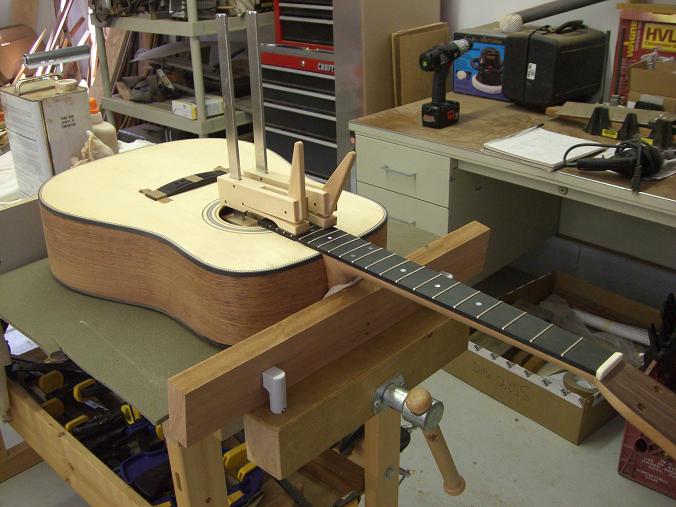
Here is a closeup of the gluing operation. Again
cam clamps
came in very handy as did my woodworking bench and my bench dogs. At
this point the bridge (shown in the background) is just taped on in its
approximate position. The guitar was rough sanded before the neck was attached. The beauty of the mahogany is starting to show through. |
 |
Gluing the bridge into place. Correct positioning
of the
bridge is the single
most important step in building an acoustic guitar. If the
bridge/saddle is
not the correct distance from the 12th fret or if the bridge is not at
the correct angle the intonation of the guitar will suffer. A guitar
with bad intonation is worthless because it may sound fine when tuned
and played in the first position but sound progressively worse as you
play up the neck. I must have measured the bridge distance and angle 30
times before I finally mounted it. Since the bridge is glued on and the
string holes are drilled through the sound board there is no moving the
bridge if it is in the wrong place. I drilled a small hole in the saddle slot between the 3rd and 4th strings so I could see the measurement markings I made on the sound board. I used the hole to position the bridge the correct distance from the 12th fret. I had penciled lines on the sound board in front of the bridge to get the angle right. |